[Latest Guide] How to Change the Green Background in Panzoid?

Video content creation has become increasingly popular, and video editing is a critical component of creating engaging content that resonates with audiences. With the emergence of Panzoid, an online video editor, creators can utilize green screen technology to create custom videos that stand out. However, to take your content to the next level, you need a full-featured video editing software. Filmora provides powerful features for advanced effects, transitions, and text, making it the perfect complement to Panzoid.

1. How to Change the Green Background in Panzoid?
Step 1: Upload your video
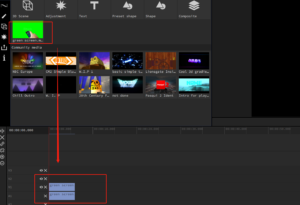
Open Panzoid and click on the “Media” button and import the video you want to edit. Wait for the video to upload and be processed by the tool.

Step 2: Drag the video
Drag the video to the timeline at the bottom of the screen and select it.
Step 3: Click Effect icon and add chroma key
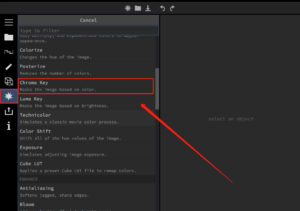
Click the Effect icon, then select “+” to add an effect. Select “Chroma Key” from the drop-down menu.
Step 4: Remove green screen
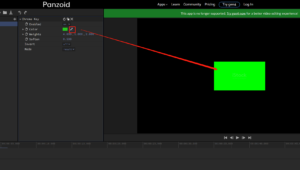
Click the “Eyedropper” button and tap on the green color you want to remove in the video, and it will be removed.
Step 5: Insert a background image
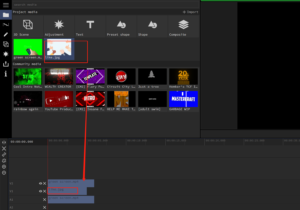
Then go back to the Media page and import the required background image. After the import is successful, pull the background image to Timeline and put it on the lower layer of the original video.
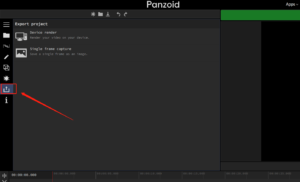
Step 6: Preview and download the video
Once you’re happy with your selection, preview your edited video to make sure the green background has been properly removed. After the desired background image has been switched successfully, you can click the “Export” button to download the edited video.
2. Common Mistakes and Troubleshooting Tips
☀Poor lighting: If the lighting in the original footage is poor, it can affect the quality of the green screen removal. Make sure that your subject is well-lit and there is no shadow on the green screen.
☀Uneven green screen color: If the green screen is not a consistent color throughout the footage, it can make it difficult to remove. Use the “Choose Color” button to select the green screen color and adjust the “Threshold” and “Smoothness” sliders to refine the selection.
☀Distorted subject: If the subject in the video is distorted or blurry, it can be difficult to remove the green screen properly. Make sure that your subject is in focus and clearly visible.
☀File format: Panzoid only supports certain file formats, such as MP4 and AVI. If you are having trouble uploading your video, check that it is in a compatible format.
☀Slow internet connection: Uploading and processing videos can take some time, especially if you have a slow internet connection. If you experience issues with the upload or processing, try using a faster internet connection or reducing the size of the video.
By being aware of these common mistakes and following these troubleshooting tips, you can ensure that your green screen removal process in Panzoid goes smoothly and results in high-quality videos.
3. Why Use Filmora to Change Green Screen?
Here are some reasons why you should use Filmora to change green screen:
✪Advanced Green Screen Capabilities
Filmora has advanced chroma key technology that can remove green screen backgrounds quickly and accurately, giving you more precise control over the editing process.
✪Easy-to-Use Interface
Filmora’s user-friendly interface makes it easy to learn and use, even for beginners. The software provides simple controls for adjusting green screen settings and adding new backgrounds.
✪Wide Range of Effects and Transitions
Filmora comes with a wide range of effects and transitions that can help enhance your video’s visual appeal. You can easily add text, graphics, and other elements to your videos to make them more engaging.
✪High-Quality Output
With Filmora, you can produce high-quality videos that are suitable for a range of platforms, including social media, websites, and streaming services.
✪Cost-Effective Solution
Compared to other professional video editing software, Filmora is a cost-effective solution that provides advanced features and capabilities at an affordable price point.
By using Filmora to remove green screens, you can create professional-looking videos with ease, making it a popular choice for video creators, vloggers, and social media influencers.
4. Step-by-Step Instructions on How to Change the Green Background Using Filmora
Step 1: Import footage
Launch Filmora and import the video clip you want to remove the green screen from.

Step 2: Add a chroma key effect
Drag and drop a video clip onto the timeline, right-click it. Then find Video in the right toolbar, select “AI Tools” from the drop-down menu, and open “Chroma Key”.
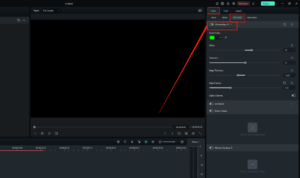
Step 3: Select a color
Select a color, or choose your own color. AI will remove it automatically, of course you can also adjust and optimize the green screen removal.
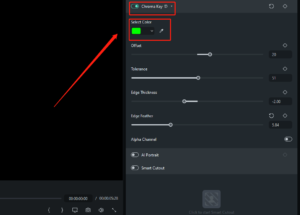
Step 4: Add a new background
After removing the green screen, you can add a new background. Click Import and choose a new background image or video. You can also use a solid color or a gradient for the background.
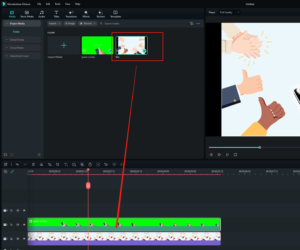
Step 5: Preview and export your video
Preview your video to make sure the green screen has been properly removed and the new background looks as expected. Once you are satisfied with the result, export the video in the desired format.
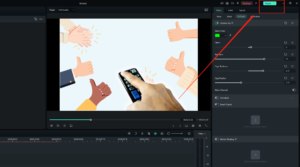
That’s it! With these simple steps, you can easily change the green background and create a professional-looking standout video with Filmora.
5. Summary
Panzoid and Filmora offer powerful tools for creating engaging and professional-looking videos. By following the step-by-step instructions in this paper, you can learn how to change the green background in Panzoid and enhance your videos using Filmora. With their combined capabilities, you can create dynamic videos that stand out on social media platforms. By taking advantage of these tools and features, you can take your video editing skills to the next level and create engaging content that resonates with your audience.
