[Top 4 Methods] How to Sync Contacts from iPhone to iPad?

Looking to effortlessly sync your contacts from iPhone to iPad? Wondering which method suits your needs best? Explore the following options and decide: Should you rely on iCloud, harness the power of iTunes, exploit AirDrop’s convenience, or consider third-party solutions for a seamless contact transfer?
1. Method #1: iCloud Sync
Ensure that both your iPhone and iPad are enrolled in with the same Apple ID before you begin.
On Your iPhone:
Connect your iPhone to a Wi-Fi network and double-check that it works.
Enable iCloud Contacts Sync:
-
Open the “Settings” app on your iPhone.
-
Tap on your Apple ID banner at the top of the screen.
-
Scroll down and select “iCloud”.
-
Toggle on the “Contacts” switch to enable iCloud contacts sync. A password associated with your Apple ID may be required.
On Your iPad:
Connect to Wi-Fi:
Put your iPad on the same wireless network as your iPhone.
Enable iCloud Contacts Sync:
-
Open the “Settings” app on your iPad.
-
Tap on your Apple ID banner at the top of the screen.
-
Scroll down and select “iCloud”.
-
Toggle on the “Contacts” switch to enable iCloud contacts sync. A password associated with your Apple ID may be required.
Wait for Sync:
After enabling iCloud contacts sync on both devices, wait for a little while. Your contacts should start syncing between your iPhone and iPad.
Check Your Contacts:
Open the “Contacts” app on your iPad to verify that your contacts have been synced. It might take some time, especially if you have a large number of contacts.
Please note that if you add, edit, or delete a contact on one device, the changes will be reflected on the other device as long as both devices are connected to the internet.
Remember to ensure that both devices are using the same Apple ID and have Wi-Fi connectivity for the contacts to sync successfully.
That’s it! Your contacts should now be synced between your iPhone and iPad using iCloud.
2. Method #2: iTunes Backup and Sync – Sync Contacts from iPhone to iPad
If you’re looking to sync your contacts from your iPhone to your iPad using iTunes, follow these detailed steps:
Step 1: Install the Latest iTunes
-
Ensure that you have the latest version of iTunes installed on your computer. It’s downloadable from Apple’s main website.
Step 2: Link Your iPhone with Your Computer
-
The iPhone can be linked to a computer via USB connection. Launch iTunes if it doesn’t open automatically.
Step 3: Backup Your iPhone
Before proceeding with the contact sync, it’s recommended to create a backup of your iPhone. This is an important step to ensure your data is safe. To back up your iPhone:
-
In iTunes, locate your iPhone icon at the top-left corner and click on it.
-
In the Summary panel, under the “Backups” section, select “This Computer” and tap on “Back Up Now”. Wait for the backup process to complete.
Step 4: Disconnect Your iPhone
-
Once the backup is complete, you can disconnect your iPhone from the computer.
Step 5: Connect Your iPad to Your Computer
-
Use a USB cable to link your iPad with the same computer.
Step 6: Restore Your iPad from the iPhone Backup
-
In iTunes, locate your iPad icon at the top-left corner and click on it.
-
In the Summary panel, under the “Backups” section, choose the iPhone backup you just created from the “Restore Backup” dropdown menu.
-
Click on “Restore” and confirm your choice. Your iPad will then be restored with the data from the iPhone backup, including contacts.
Step 7: Wait for the Sync to Complete
-
The syncing process might take some time, depending on the amount of data being transferred. Keep your iPad connected to the computer until the sync is complete.
Step 8: Verify Contacts on Your iPad
-
Once the sync is finished, you can disconnect your iPad from the computer and check if your contacts have been successfully transferred.
-
Go to the “Contacts” app on your iPad and verify that your contacts are now available.
3. Method #3: AirDrop – Syncing Contacts from iPhone to iPad
AirDrop is a wireless technology that allows you to easily share files, photos, and other content between Apple devices. You can use AirDrop to sync contacts from your iPhone to your iPad quickly. Here’s a step-by-step guide on how to do it:
Step 1: Enable Bluetooth and Wi-Fi on Both Devices
-
On your iPhone and iPad, swipe down from the upper-right corner of the screen to access the Control Center.
-
Make sure both Bluetooth and Wi-Fi icons are turned on. If not, tap on their respective icons to enable them.
Step 2: Enable AirDrop on Both Devices
-
On your iPhone and iPad, open the Settings app.
-
Scroll down and tap on “General.”
-
Tap on “AirDrop.”
-
Select “Contacts Only” or “Everyone” depending on your preference. Choosing “Contacts Only” will allow you to send and receive contacts only from your own contacts, while “Everyone” will allow any nearby Apple device to send you contacts.
Step 3: Share Contacts via AirDrop
-
Open the “Contacts” app on your iPhone.
-
Find the contact you want to share and tap on it to open the contact details.
-
Tap on the “Share Contact” option, usually located at the top of the contact’s details page.
-
A list of sharing options will appear. Select “AirDrop.”
-
Your iPad should appear as an option in the AirDrop section. Tap on your iPad’s name.
Step 4: Accept the Contact on iPad
-
On your iPad, you’ll receive a notification with the contact’s name and photo (if available) via AirDrop.
-
Tap on the notification to open the contact details.
-
You’ll see an “Add Contact” option. Tap on it to add the contact to your iPad’s address book.
Step 5: Verify and Repeat
-
Open the “Contacts” app on your iPad and make sure the contact has been successfully added.
-
Repeat the process for any other contacts you want to sync from your iPhone to your iPad.
-
Please note that AirDrop requires both devices to be relatively close to each other and have Bluetooth and Wi-Fi enabled. Additionally, the exact steps and menu options may vary slightly depending on the version of iOS/iPadOS you are using.
Following these steps should help you sync contacts from your iPhone to your iPad using AirDrop.
4. Method #4: Using Third-Party Software to Sync Contacts from iPhone to iPad
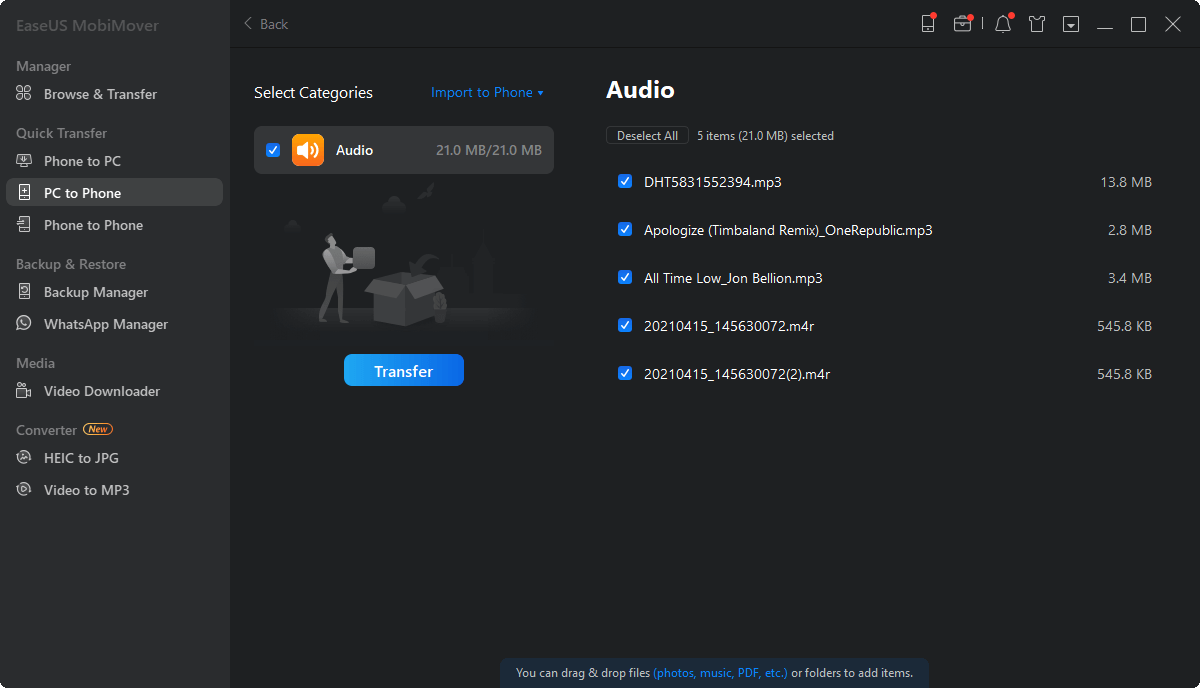
4.1 Using EaseUS MobiMover
Here’s a step-by-step guide on how to use EaseUS MobiMover to sync contacts from your iPhone to your iPad:
Step 1: Connect Your iOS Devices and Launch EaseUS MobiMover
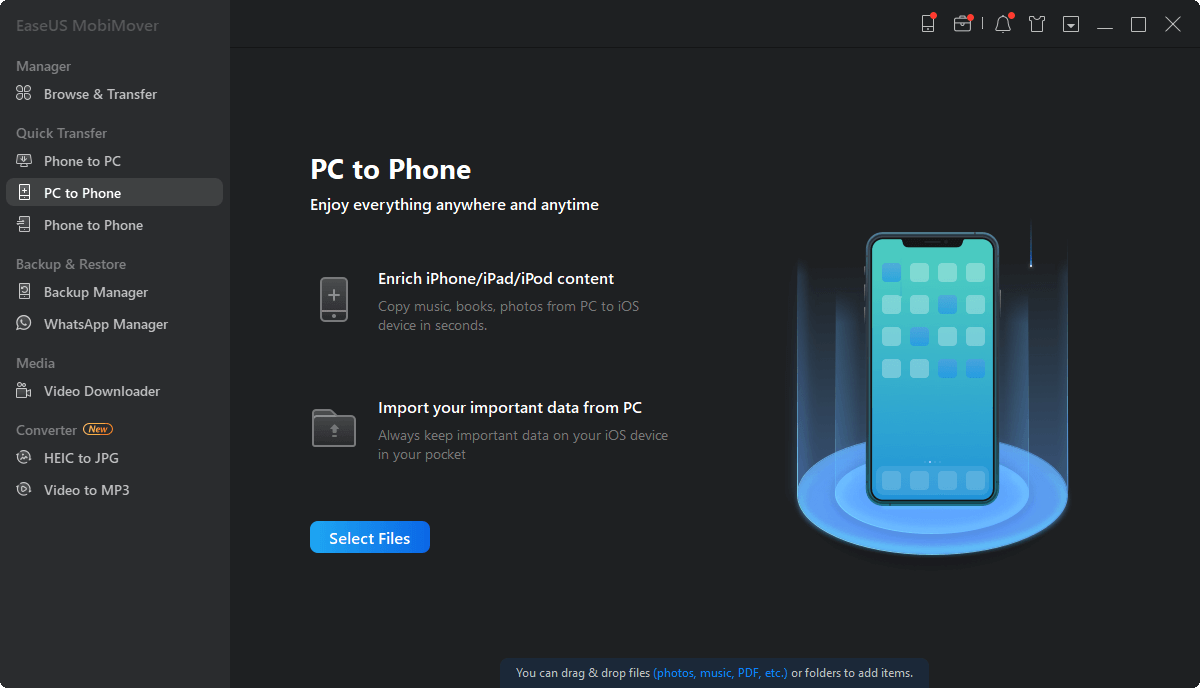
-
Connect both your iPhone and iPad to your computer using their respective USB cables.
-
Launch EaseUS MobiMover on your computer.
Step 2: Access Contacts and Select Categories
-
Ensure that you have trusted your computer on both your iPhone and iPad if prompted.
-
In the EaseUS MobiMover interface, click on “Content Management” in the left sidebar.
-
From the Content Management menu, select “Contacts.”
Step 3: Select Contacts to Transfer

-
You’ll now see a list of your iPhone contacts in the main window of MobiMover.
-
Choose the contacts you want to transfer from your iPhone to your iPad by selecting the checkboxes next to their names.
-
After selecting the contacts, click on the “More” option located in the lower-right corner of the window.
Step 4: Initiate the Transfer Process
-
A drop-down menu will appear. Select “To Another Phone” from the menu options.
-
MobiMover will prompt you to choose the target device. Choose your iPad from the list of available devices. Click “Next” to continue.
Step 5: Wait for the Transfer to Complete
-
Select the “Transfer” button to start the transfer process.
-
MobiMover will begin transferring the selected contacts from your iPhone to your iPad.
-
You’ll be able to see the progress of the transfer on the screen.
Step 6: Verify Transferred Contacts on Your iPad
-
Once the transfer is complete, MobiMover will display a “Transfer Completed” message.
-
On your iPad, open the “Contacts” app to view and verify the contacts that have been transferred from your iPhone.
4.2 Using AnyTrans
Here’s a step-by-step guide on how to use AnyTrans to sync contacts from your iPhone to your iPad:
Step 1: Launch AnyTrans and Connect Devices
-
Begin by launching AnyTrans on your computer. Make sure you have downloaded and installed the software.
-
Attach both your iPhone and iPad to your computer using USB cables.
-
Once the devices are connected, you’ll be in the main interface of AnyTrans. Click on the “Device Manager” option.
Step 2: Access the Contacts Transfer Interface
-
In the Device Manager section, locate and click on the “More” option. This will support you to access more advanced features, including contact management and transfer.
-
You might need to scroll down the left panel screen to find the contacts-related options.
Step 3: Select Contacts for Transfer
-
In the left panel, you’ll see options related to contacts. Choose the source device (your iPhone) from which you want to transfer contacts.
-
A list of contact management options will appear. Select “Contacts” to view your contacts on the iPhone.
Step 4: Initiate Contact Transfer
-
Select the people you want to add to your iPad from your address book. By holding down the Ctrl (Windows) or Command (Mac) key while clicking, you can pick either a single contact or a group of them.
-
After selecting the contacts, click on the “To Device” button located in the upper-right corner of the AnyTrans interface.
Step 5: Choose Target Device (iPad)
-
A dropdown menu will appear after clicking “To Device.” Select your target device, which is your iPad, from the list of available devices.
-
AnyTrans will prompt you to confirm the transfer. Click “OK” to proceed.
Step 6: Transfer in Progress
-
AnyTrans will begin the process of transferring the selected contacts from your iPhone to your iPad.
-
You will see a progress bar showing the status of the transfer.
Step 7: Verify Contacts on Your iPad
-
Once the transfer is complete, disconnect both devices from the computer.
-
On your iPad, open the “Contacts” app to verify that the contacts have been successfully transferred.
Using AnyTrans allows you to easily transfer contacts and other data between your iOS devices. Always make sure to follow the on-screen instructions provided by AnyTrans and double-check your selections before initiating the transfer.
5. Summary
You can sync your iPhone’s contacts with your iPad via iCloud, iTunes, AirDrop, or third-party apps. Pick the approach that meets your needs and preferences the most for a trouble-free contact transfer between gadgets.