How to Change iPhone Name? [Latest Guide]

Are you looking to personalize your iPhone and make it uniquely yours? Have you ever wondered how to change your iPhone’s name to reflect your style and preferences? This paper will walk you through the straightforward steps to change an iphone name.
1. How to Change an iPhone Name?
Are you interested in learning how to change the name of your iPhone? Whether you want to personalize your device or make it more easily recognizable, the process is simple and quick. To change the name on your iPhone, follow these steps:
Step 1: Accessing the Settings App

-
Please locate and select the “Settings” application on the home screen of your iPhone.
-
Navigating to General Settings
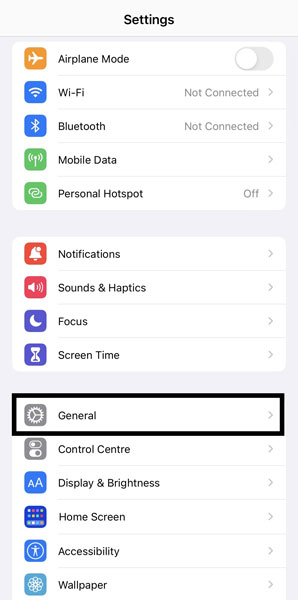
- Scroll down and tap on “General.”
Step 2: Accessing About

-
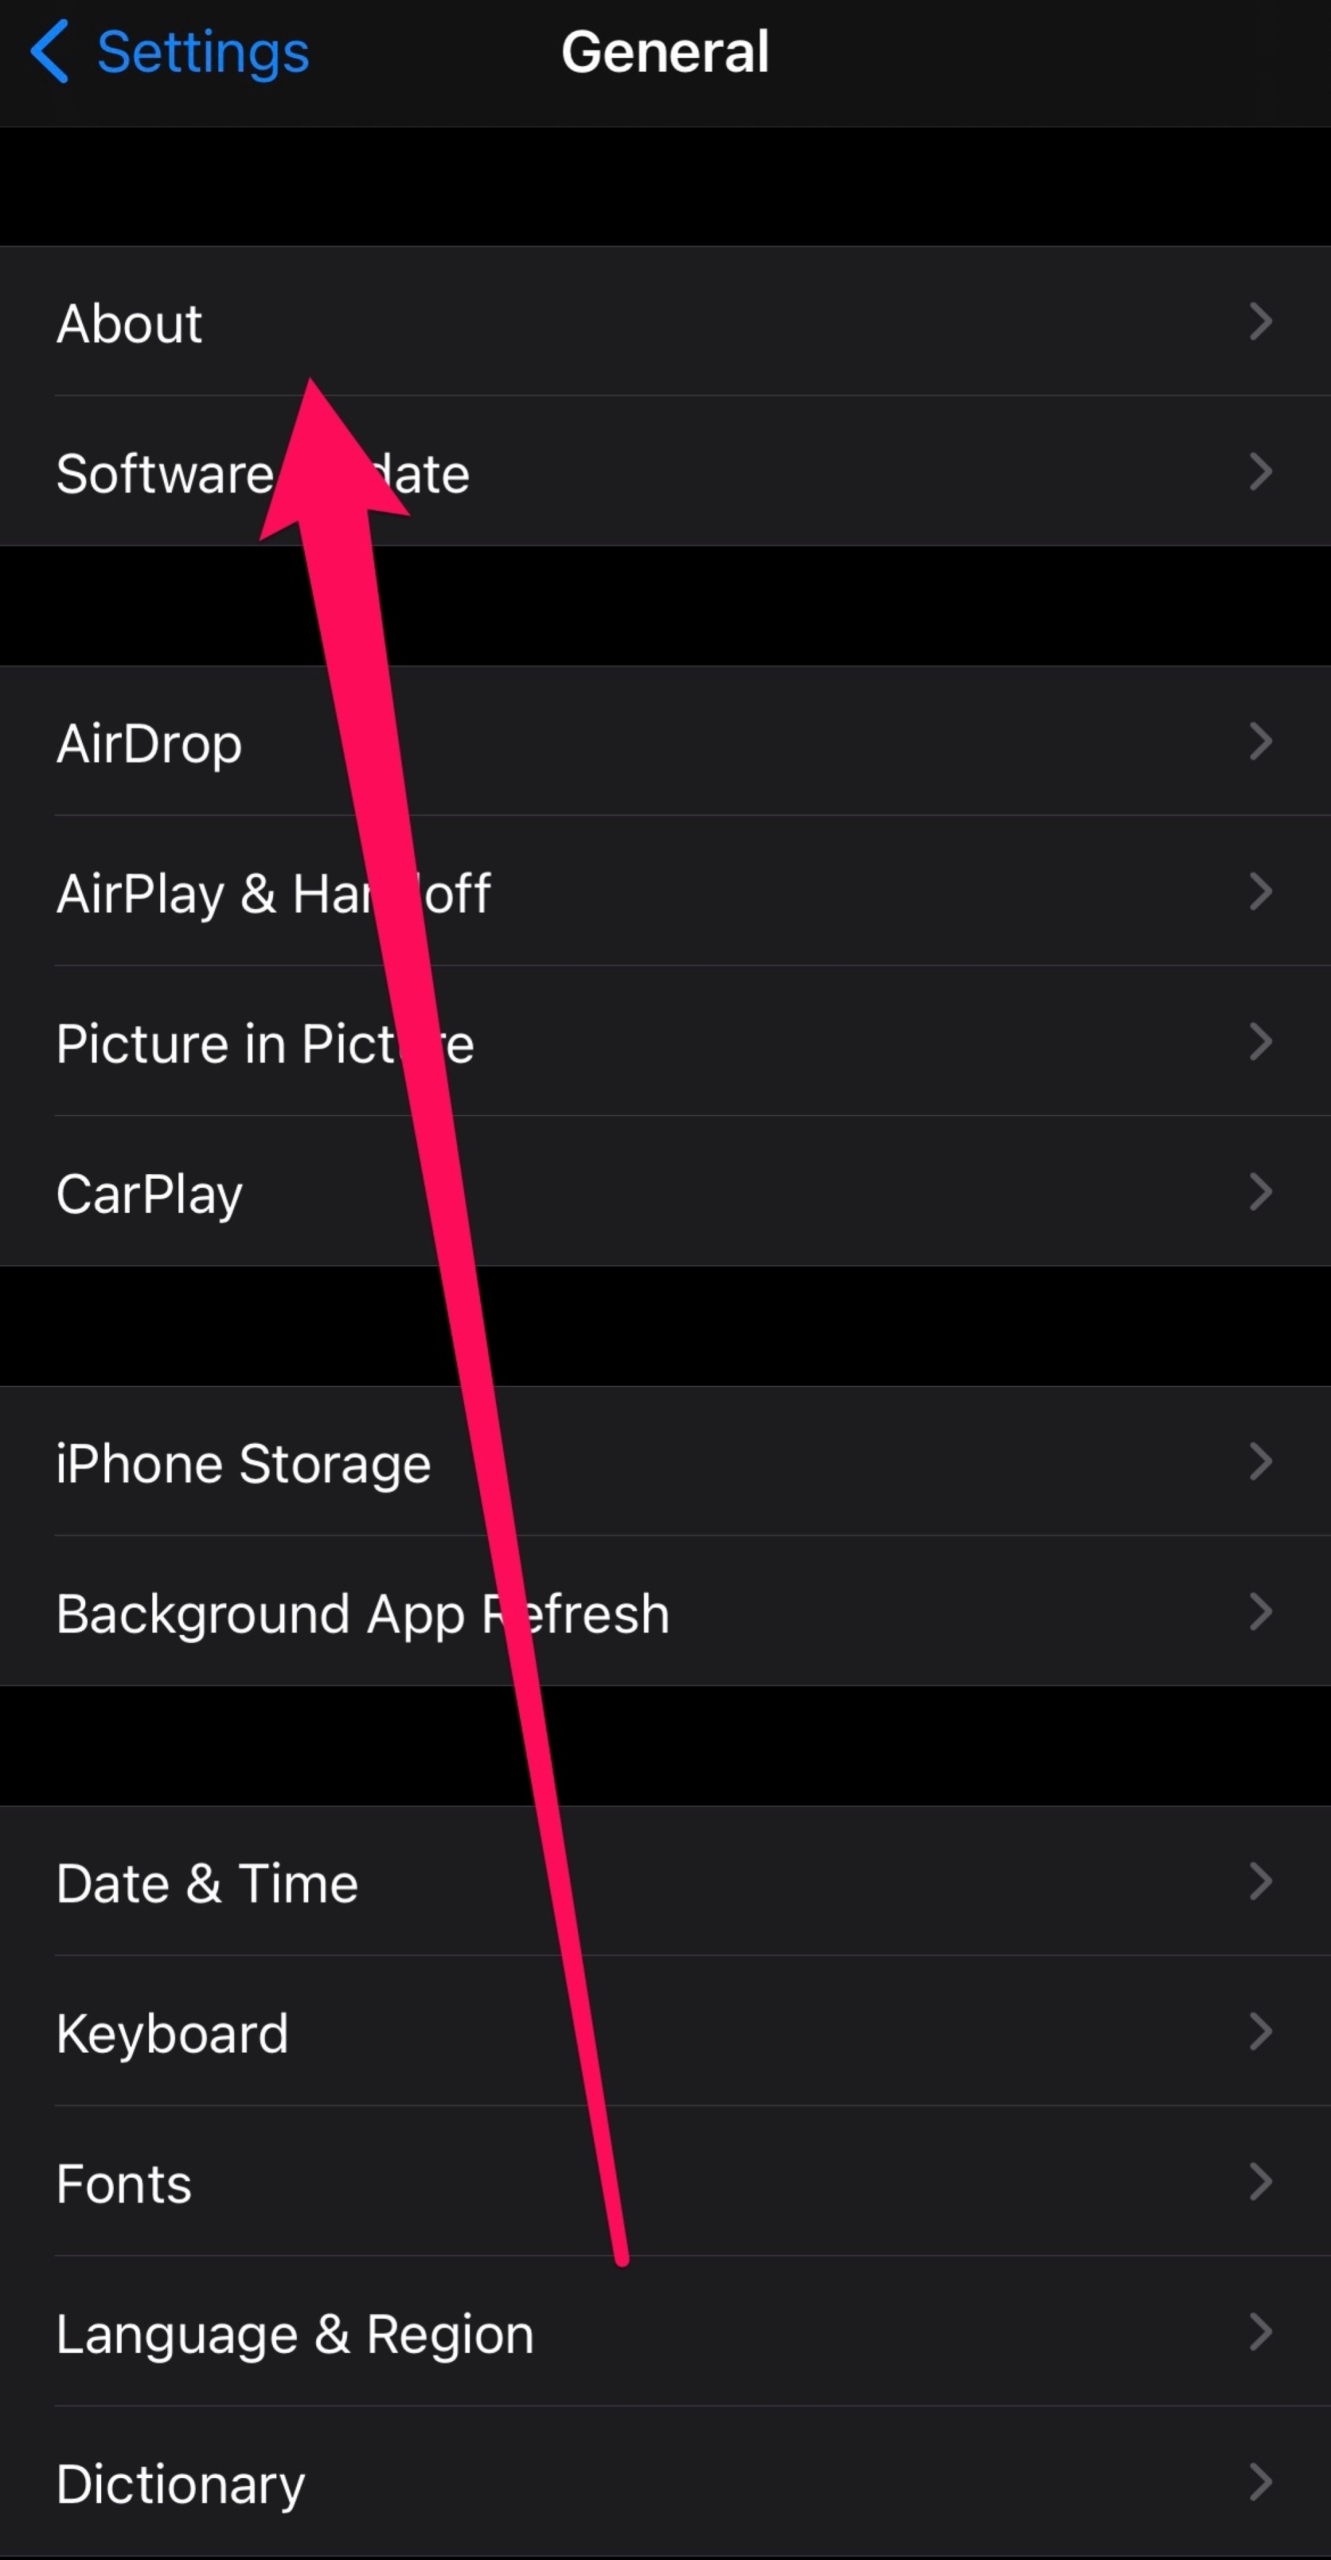
Scroll down and select “About.”
Step 3: Changing the iPhone Name

-
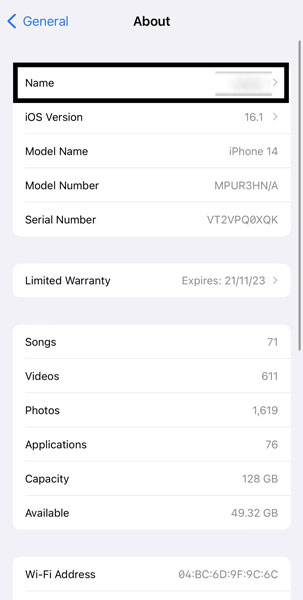
Tap on “Name,” which displays your current iPhone name.
-
A text field shall be displayed, enabling you to modify the name.
-
Enter the desired new name for your iPhone.
Step 4: Saving Changes
-
After entering the new name, press “Done” on the keyboard.
Step 5: Verifying the Change
-
Go back to the main Settings page to ensure the name change has taken effect.
-
The new name should be displayed at the top of the screen.
Remember, changing your iPhone’s name is not only a simple process but also a great way to personalize your device and make it uniquely yours.
2. Tips and Considerations for Changing Your iPhone’s Name
A. Avoid using special characters or emojis in the name
Stick to alphanumeric characters (letters and numbers) to ensure compatibility and ease of use across different systems and services.
B. Ensure the new name is easily recognizable for device identification
Select a nomenclature that facilitates prompt identification of your device, particularly if you possess numerous Apple devices associated with the identical account.
C. Changes may reflect in iCloud and other connected services
Keep in mind that the new name might be used in iCloud backups, device syncing, and interactions with other Apple devices. Make sure the name change aligns with your preferences across your ecosystem.
Remember that the name change is a straightforward process, but these considerations can help you avoid potential complications or confusion down the line.
3. Potential Issues and Troubleshooting when Changing iPhone Name
A. Name Change Not Taking Effect
Restart the iPhone and Check Again: A simple restart can sometimes resolve minor glitches.
Turn off and then turn on your iPhone and verify if the name change has been applied.
Make Sure You Followed the Steps Correctly: Double-check if you followed each step accurately while changing the name. Mistakes in the process could lead to the name not being updated.
Update Your iPhone to the Latest iOS Version: Outdated software might cause unexpected issues. Ensure your iPhone is running the latest iOS version by going to “Settings” > “General” > “Software Update.”

B. Syncing Issues with iCloud and Other Devices:
Sign Out and Back into iCloud: Sometimes, signing out of iCloud on your iPhone and signing back in can re-establish proper syncing. Go to “Settings” > [Your Name] > “Sign Out,” and then sign back in.
Ensure All Devices Use the Same Apple ID: If you have multiple devices, ensure they are all using the same Apple ID for iCloud services. This can help maintain consistent data syncing and minimize conflicts.
These troubleshooting steps should help address common issues you might encounter when changing your iPhone’s name. If problems persist, you might want to explore Apple Support resources or contact their customer support for more tailored assistance.
4. Summary
Changing your iPhone’s name is a simple process that allows for personalization and easy device identification. By following the steps outlined and considering tips for a seamless transition, you can update your device’s name to better suit your preferences. Should any issues arise, troubleshooting steps are available to ensure a smooth experience and proper syncing across devices.

