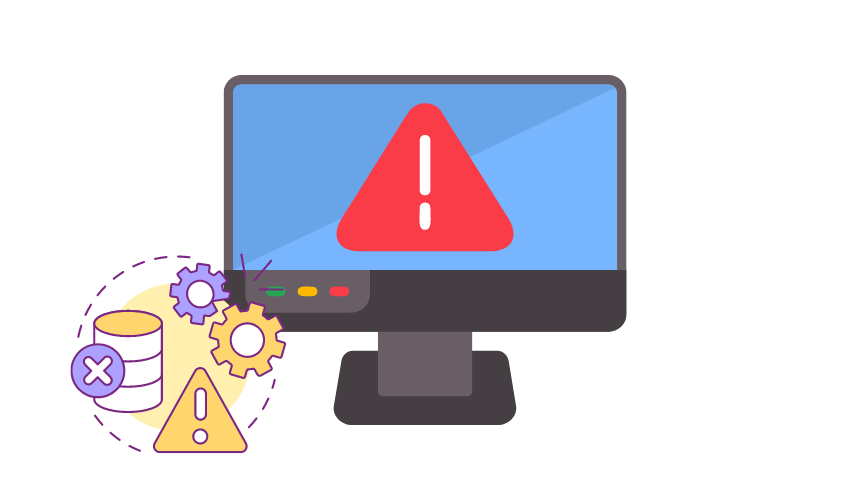
Computer Crashed? How to Fix It?

Is your computer constantly crashing, leaving you frustrated and unsure of how to fix the issue? Computer crashes can occur due to a variety of reasons, and identifying the root cause is crucial to finding an effective solution. This paper aims to explore the common causes of computer crashes and provides step-by-step guidelines to troubleshoot and resolve these issues.
1. Computer crashed? Why?
1.1 Hardware Failure
One of the most common reasons for a computer crash is hardware failure. This could be due to overheating, faulty RAM, a failing hard drive, or other components malfunctioning.
1.2 Software Conflicts
Sometimes, incompatible or poorly coded software can conflict with each other, leading to crashes. This can happen when different programs try to access the same resources simultaneously.
1.3 Driver Issues
Outdated or corrupted device drivers can cause instability and lead to crashes, especially when hardware components are not functioning correctly.
1.4 Malware or Viruses
Malicious software can infiltrate a computer system, causing it to behave unpredictably and crash as it attempts to carry out harmful activities.
1.5 Insufficient Resources
Running resource-intensive applications or too many programs simultaneously can overwhelm the computer’s available resources, leading to a crash.
1.6 Operating System Problems
Bugs or glitches within the operating system itself can cause crashes. These issues are often patched with updates and fixes from the OS provider.
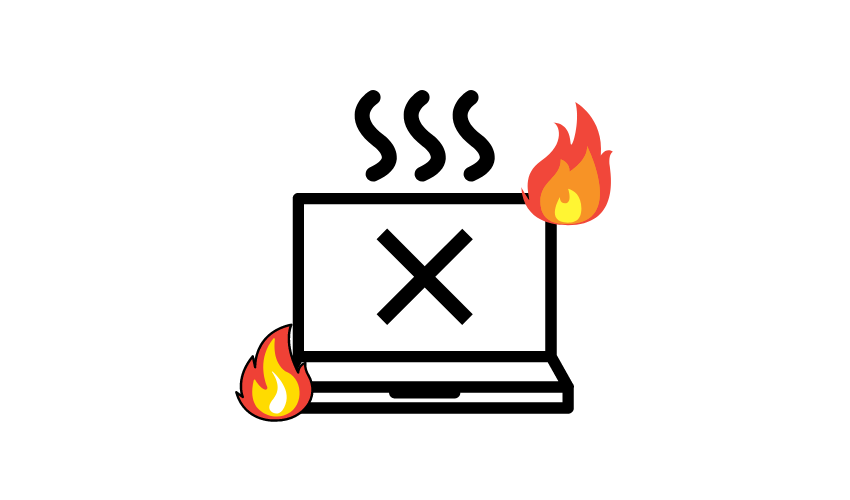
1.7 Overheating
If a computer’s cooling system is inadequate or blocked, it can lead to overheating, which triggers automatic shutdowns to protect the hardware.
1.8 Power Issues
Unstable power supply, power surges, or sudden power outages can cause a computer to crash, especially if it is not connected to a reliable UPS (Uninterruptible Power Supply).
1.9 Hardware Incompatibility
When new hardware components are added to a computer without proper compatibility checks, it can lead to crashes and instability.
It’s essential to investigate the specific circumstances surrounding the crash to pinpoint the exact cause. If your computer has recently crashed, you may want to check the system event logs and consider seeking technical assistance to diagnose and fix the issue.
2. How to Fix Computer Keeps Crashing?
If your computer keeps crashing, it can be frustrating, but there are several steps you can take to troubleshoot and fix the issue. Here’s a step-by-step guide to help you out:
Method 1: Check for Overheating
- Make sure your computer is placed in a well-ventilated area.
- Clean any dust or debris from the fans and vents using compressed air.
- Consider installing temperature monitoring software to check if overheating is the problem.
Method 2: Update Device Drivers
- Visit the manufacturer’s website for your computer or individual components (graphics card, sound card, etc.).
- Download and install the latest drivers for each device.
Method 3: Scan for Malware
- Run a thorough antivirus and antimalware scan to check for any malicious software.
- Quarantine or remove any threats detected.

Method 4: Check Hardware Components
- Reseat RAM modules and expansion cards (such as graphics cards) to ensure they are properly connected.
- Test the RAM using Windows Memory Diagnostic or Memtest86.
Method 5: Check for Disk Errors
- Open Command Prompt as an administrator.
- Type “chkdsk C: /f” (replace “C” with the drive letter of your main system drive) and press Enter.
- Follow the prompts to schedule a disk check on the next system restart.
- Restart your computer to let Windows scan and fix any disk errors.
Method 6: Run System File Checker (SFC)
- Open Command Prompt as an administrator.
- Type “sfc /scannow” and press Enter.
- Wait for the scan to complete and follow any instructions provided.
Method 7: Update Windows and Software
- Check for Windows updates and install any available updates.
- Update all your software, including third-party applications.

Method 8: Check for Software Conflicts
- Uninstall any recently installed software that might be causing conflicts.
- Disable unnecessary startup programs.
Method 9: Check Power Supply
- Ensure that the power supply unit (PSU) is functioning correctly and providing stable power to your components.
Method 10: Perform a Clean Boot
- Temporarily disable all non-essential startup items and services using the System Configuration utility (msconfig).
- Reboot your computer and see if the crashes persist.
Method 11: Monitor in Safe Mode
- Boot your computer into Safe Mode and observe if the crashes occur in this mode.
- If they do not, it may indicate that the issue is related to third-party software or drivers.
If the computer still keeps crashing after following these steps, there might be more complex hardware issues that require professional diagnosis and repair. In such cases, consider seeking help from a qualified technician or a computer repair service.
3. How to Fix Computer Keeps Crashing Quickly?
To quickly fix a computer that keeps crashing, you can follow these steps using two specific software tools: EaseUS Partition Master and PassFab FixUWin. These tools can help you identify bad sectors on your hard drive and perform automated repairs to resolve potential issues. Here’s how to do it:
3.1 Using EaseUS Partition Master
Download and install EaseUS Partition Master on your computer.
Launch the application.

In the main interface, locate the disk that you want to check for bad sectors.
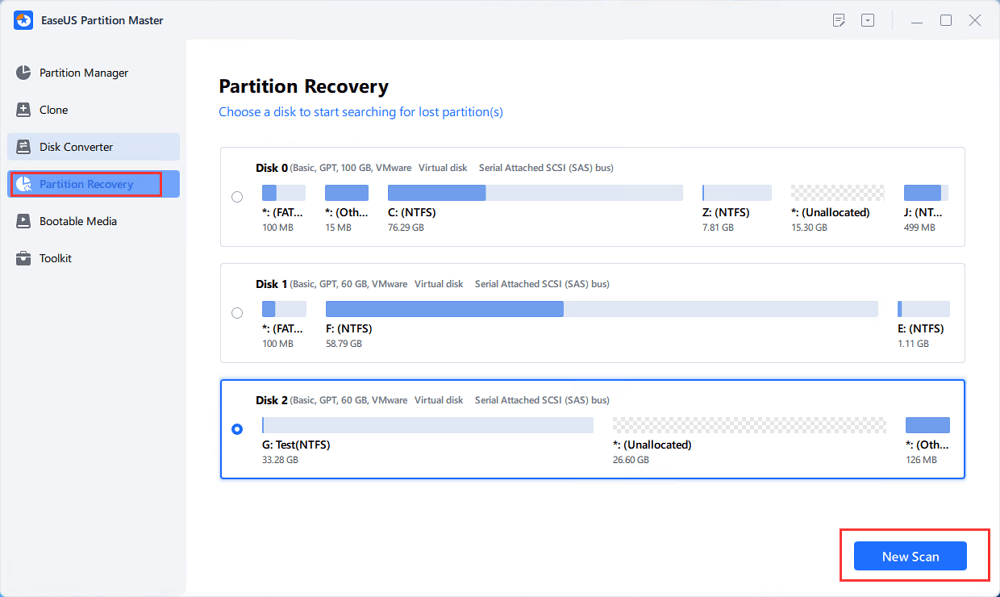
Right-click on the disk and select “New Scan”
The surface test operation will begin immediately, and any bad sectors found will be marked as red.
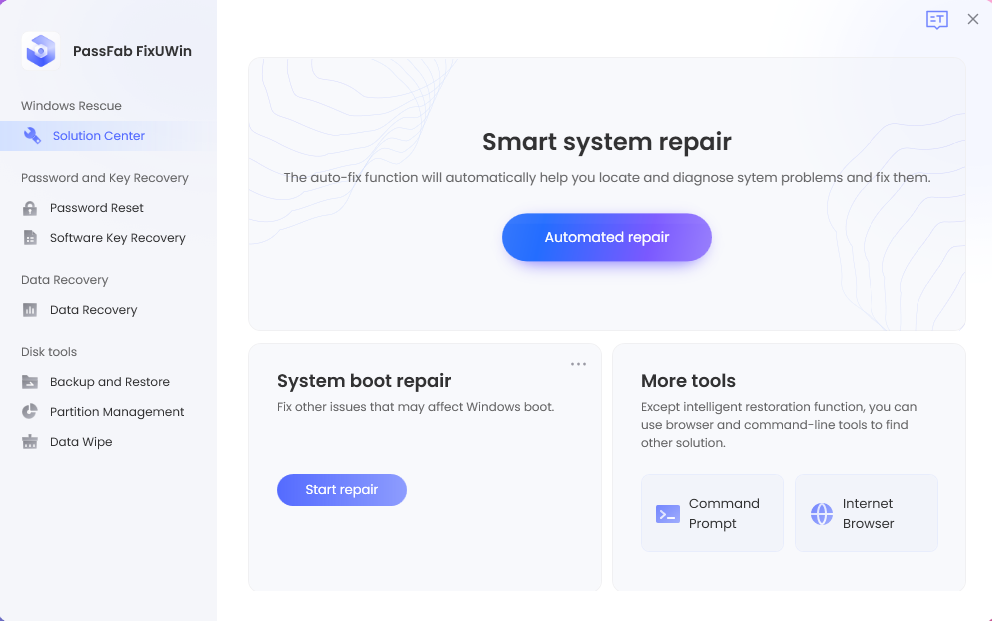
3.2 Using PassFab FixUWin
Download and install PassFab FixUWin on your computer. Launch the application.
Click on “Automated Repair” to start the repair process.
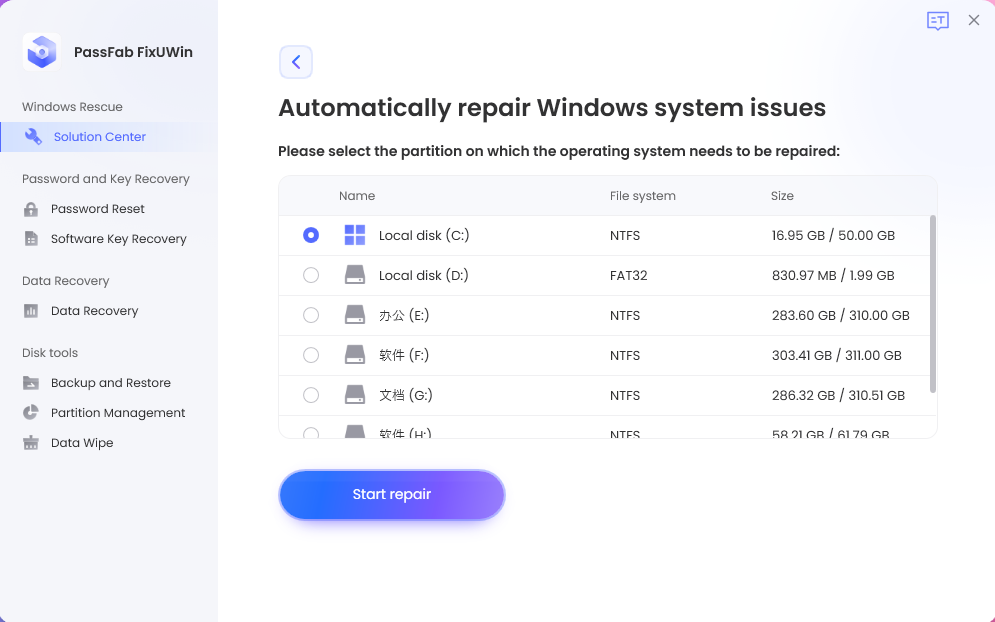
Choose the partition that you suspect might be causing the crashes. Click “Start Repair” to initiate the automated repair process.
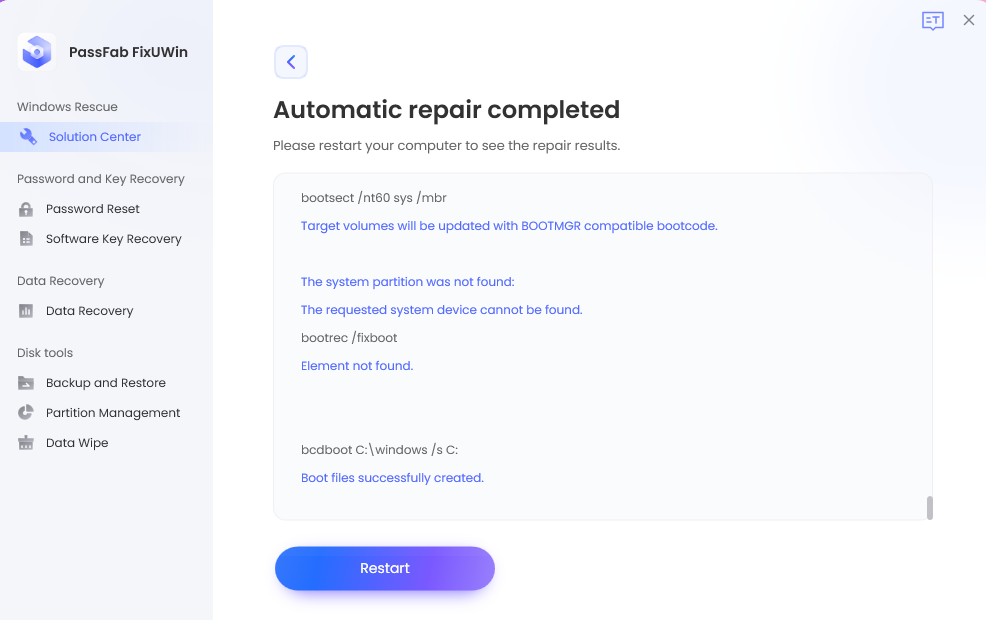
Once the repair is complete, you will be notified of the successful completion. Click “Restart” to reboot your computer.
Please note that while these steps can help with specific issues related to bad sectors and automated repairs, they may not address all possible reasons for computer crashes. If the crashes persist after performing these steps, it’s essential to investigate other potential causes, such as driver conflicts, software issues, or hardware problems.
For a comprehensive and accurate diagnosis of your computer’s crashing issue, it is advisable to seek professional help from a qualified technician or computer repair service. Additionally, ensure that you backup your important data before attempting any repairs to prevent data loss.
4. How to Recover Data from a Crashed Computer?
To recover data from a crashed computer, you can follow these steps using 4DDiG Data Recovery software. This process involves creating a bootable drive and using it to access and recover data from the crashed computer. Here’s how to do it:
Step 1: Arrange for Data Recovery
Prepare a working computer and a USB drive/CD/DVD with more than 1.5GB of storage space.
Step 2: Connect Your USB Drive and Choose a Path
Download and launch 4DDiG Data Recovery on the working computer.
Connect the USB drive to the working computer.
Select “Recover from Crash Computer” from the software interface.
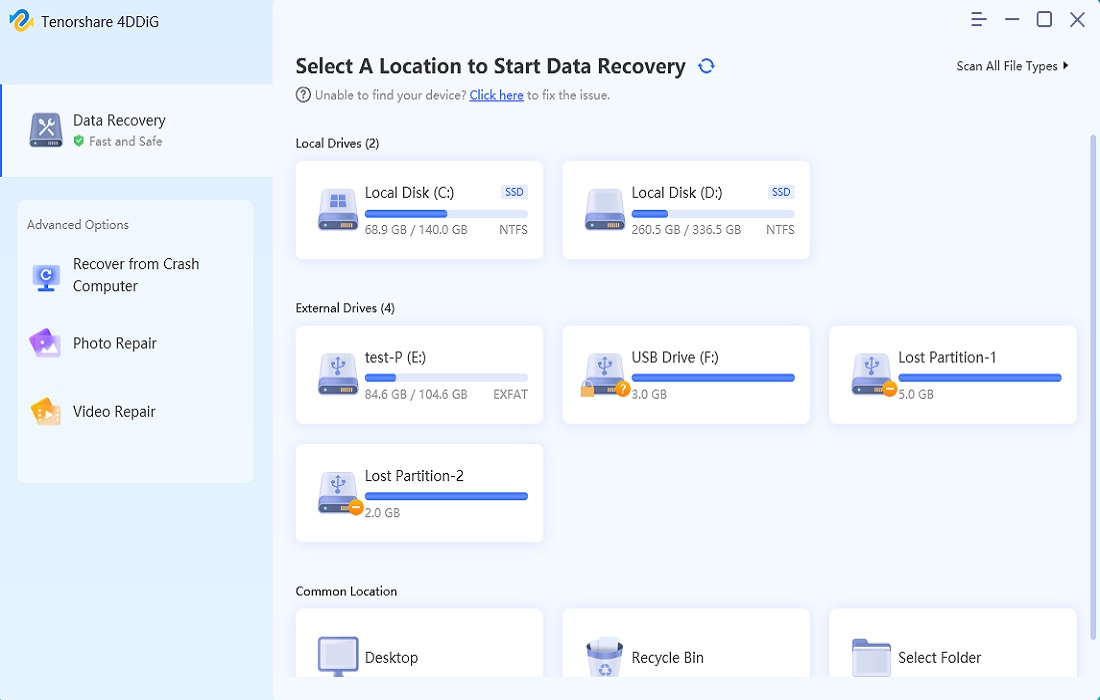
Click on “Scan” to proceed with the data recovery process.
Step 3: Establish a Bootable Drive
Choose an external USB/DVD drive to create a bootable drive. Note that the USB/DVD drive will be formatted during this operation.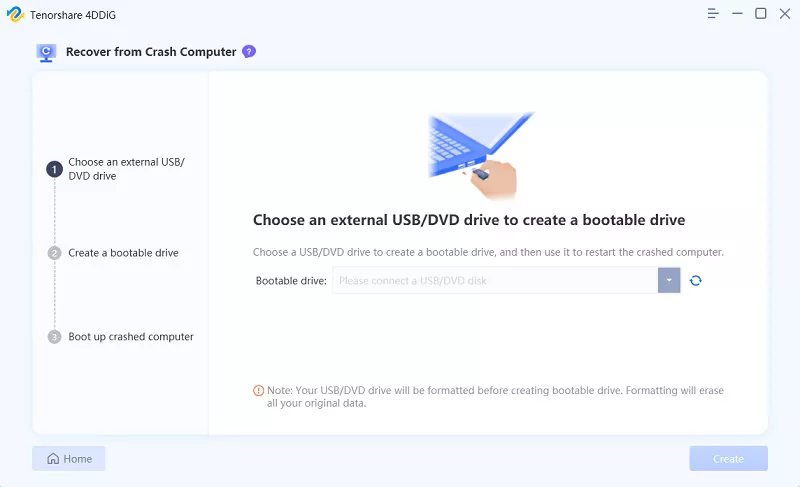
Do not use the USB/DVD drive during the process of recovery.
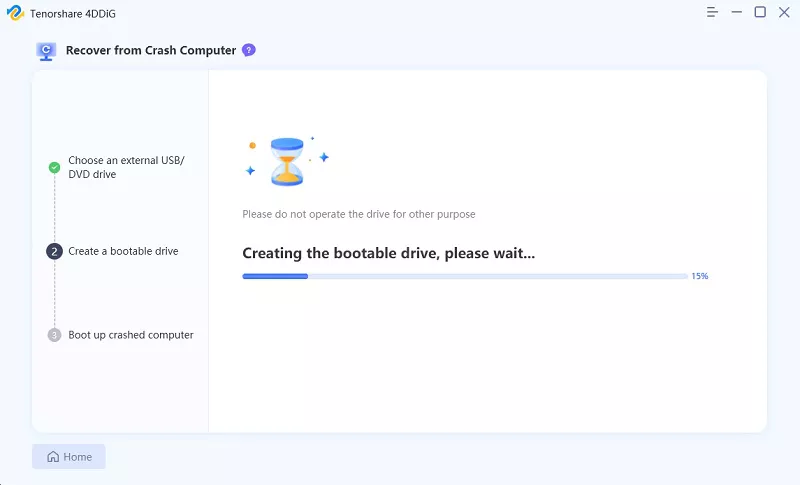
After successfully creating the bootable drive, proceed to the next step.
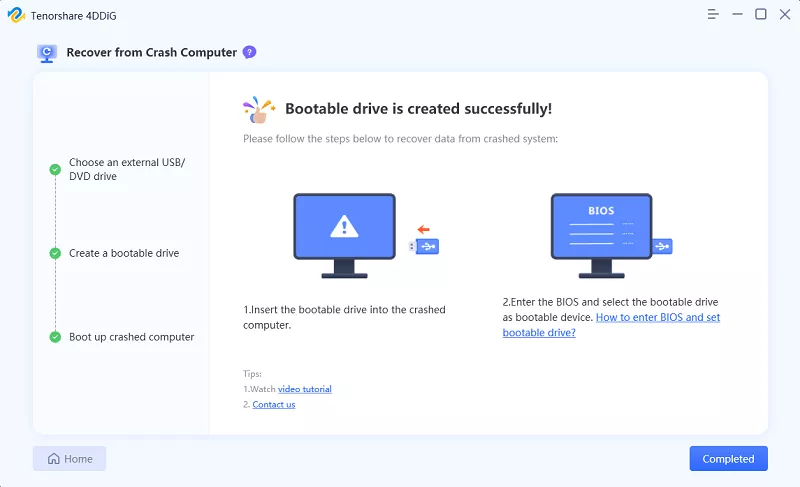
Step 4: Restart Your Crashed PC
Insert the bootable drive (USB/DVD) that you created from the other working computer into your crashed computer.
As soon as the computer brand logo appears, press the corresponding key (usually displayed on the screen) to enter the BIOS settings. Note that every computer has a different start key for accessing the BIOS settings.
Step 5: Recover Data from Crashed PC
After entering the BIOS settings, use the arrow keys to switch to the boot tab and choose the boot device (the USB/DVD drive).
The files will start loading, but wait for the configuration.
4DDiG Data Recovery will launch automatically on the crashed computer.

Select the path or drive containing the data you want to recover.
Start the data recovery process. Once the data recovery is complete, save the recovered data to an external device for security purposes.
Please note that data recovery from a crashed computer can be a sensitive process, and there’s no guarantee of 100% success. If you encounter any difficulties during the recovery process or suspect that your computer has hardware issues, it’s advisable to seek professional help from data recovery experts to avoid potential data loss.
5. The Bootom Line
Computer crashes can be caused by various factors. To address frequent crashes, users can follow a systematic approach to troubleshoot and resolve the issue. Steps may include checking for overheating, updating device drivers, scanning for malware, testing hardware components, and ensuring a stable power supply. Users can also use software tools like EaseUS Partition Master and PassFab FixUWin to identify bad sectors and perform automated repairs. For data recovery from a crashed computer, utilizing 4DDiG Data Recovery with a bootable drive can help access and retrieve valuable data.