[The Ultimate Guide] How to Fix M.2 Drive Not Showing Up?

Have you ever encountered the frustrating situation where your M.2 drive is not showing up or being detected by your computer? However, when faced with the problem of an undetected M.2 drive, it is essential to understand the possible causes and explore effective troubleshooting steps. In this paper, we will delve into the reasons behind an M.2 drive not showing up and provide insights into how to resolve this issue, ensuring optimal functionality and data accessibility.
1. What is M.2 Drive?
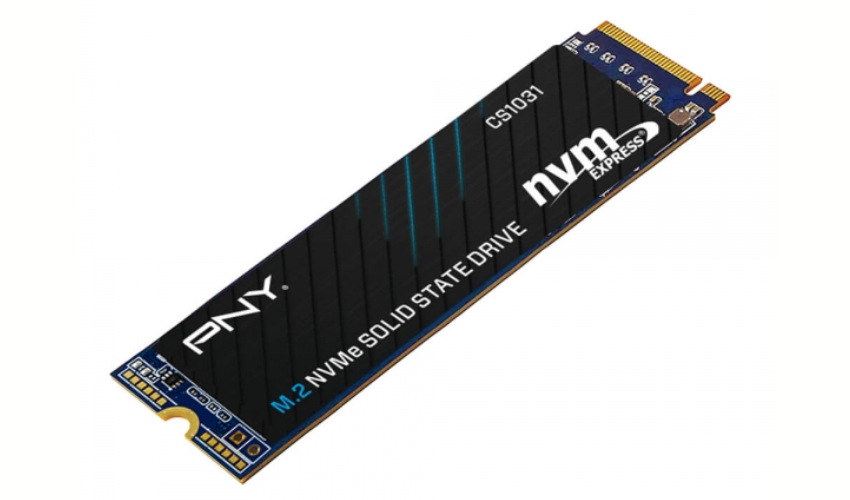
The M.2 drive, also known as NGFF, is a compact and high-performance solid-state drive (SSD) that connects directly to the motherboard. It replaces traditional storage devices like HDDs and offers faster data transfer rates. M.2 drives come in different sizes and support various interface standards such as SATA and NVMe. They are widely used in laptops, desktops, and other devices for their speed, compactness, and versatility.
2. Possible Causes of M.2 Drive Not Showing Up
When an M.2 drive fails to show up or be detected by the system, several potential causes should be considered. Understanding these causes can help in troubleshooting and resolving the issue effectively.
2.1 Physical connection issues
Loose or improperly connected cables: The M.2 drive may not be properly connected to the motherboard or the M.2 slot. Loose or improperly inserted cables can result in a poor connection, leading to the drive not being detected.
Incorrect installation of the M.2 drive: Improper installation, such as not aligning the drive correctly with the slot or not securing it firmly, can prevent proper detection by the system.
2.2 Compatibility issues
Mismatched interface standards: If the M.2 drive’s interface standard (SATA or NVMe) is not compatible with the motherboard or system, the drive may not be recognized.
Incompatible motherboard or BIOS settings: Certain motherboards or BIOS configurations may have restrictions or limitations regarding M.2 drive compatibility. In such cases, the drive may not show up if the settings are not adjusted accordingly.
2.3 Driver or firmware-related problems
Outdated or missing drivers: If the system lacks the necessary drivers for the M.2 drive, it may not be detected. Outdated drivers can also cause compatibility issues, leading to the drive not showing up.
Firmware issues with the M.2 drive: The firmware of the M.2 drive may need updating to ensure proper compatibility and functionality. Outdated or incompatible firmware can result in the drive not being recognized by the system.
By considering these potential causes, users can effectively troubleshoot and address the issue of an M.2 drive not showing up, thereby restoring its functionality and enabling optimal performance.
3. How to Fix M.2 Drive Not Showing up?
To address the issue of an M.2 drive not showing up, the following troubleshooting steps can be taken:
3.1 Physical inspection and reconnection
Checking cables and connections:
Ensure that the cables connecting the M.2 drive to the motherboard are securely attached and properly seated. Reconnect any loose or improperly connected cables.
Verifying proper installation of the M.2 drive:
Double-check the installation of the M.2 drive to ensure it is correctly inserted into the M.2 slot. Remove and reinsert the drive if necessary, ensuring it is firmly secured.
3.2 Checking compatibility and settings
Ensuring compatibility between the M.2 drive and motherboard:
Confirm that the M.2 drive’s interface standard (SATA or NVMe) is compatible with the motherboard. Refer to the motherboard’s specifications and documentation for compatibility information.
Checking BIOS settings for M.2 drive detection:
Access the computer’s BIOS settings and verify that the M.2 drive detection option is enabled. Consult the motherboard’s manual for instructions on accessing and modifying BIOS settings.
3.3 Updating drivers and firmware
Downloading and installing the latest drivers for the M.2 drive:
Visit the manufacturer’s website or the motherboard manufacturer’s support page to download the latest drivers specifically designed for the M.2 drive. Install the drivers and restart the system.
Updating the firmware of the M.2 drive if necessary:
Check the manufacturer’s website for any firmware updates for the M.2 drive. Follow the provided instructions to update the drive’s firmware, ensuring improved compatibility and functionality.
By following these troubleshooting steps, users can often resolve the issue of an M.2 drive not showing up. If the problem persists after attempting these steps, it may be necessary to seek professional assistance or consider the possibility of hardware or component failure. Additionally, it is always advisable to regularly backup important data to prevent data loss during troubleshooting procedures.
4. How to Recover Undetected Data from M.2 SSD?
4.1 Using EaseUS Data Recovery Wizard
If your M.2 SSD is not recognized in Windows 10 and the previous troubleshooting methods have not resolved the issue, you can try recovering your undetected data using EaseUS Data Recovery Wizard, a reliable data recovery software. Follow these steps:
-
Download EaseUS Data Recovery Wizard.
-
Install the software on your computer.
-
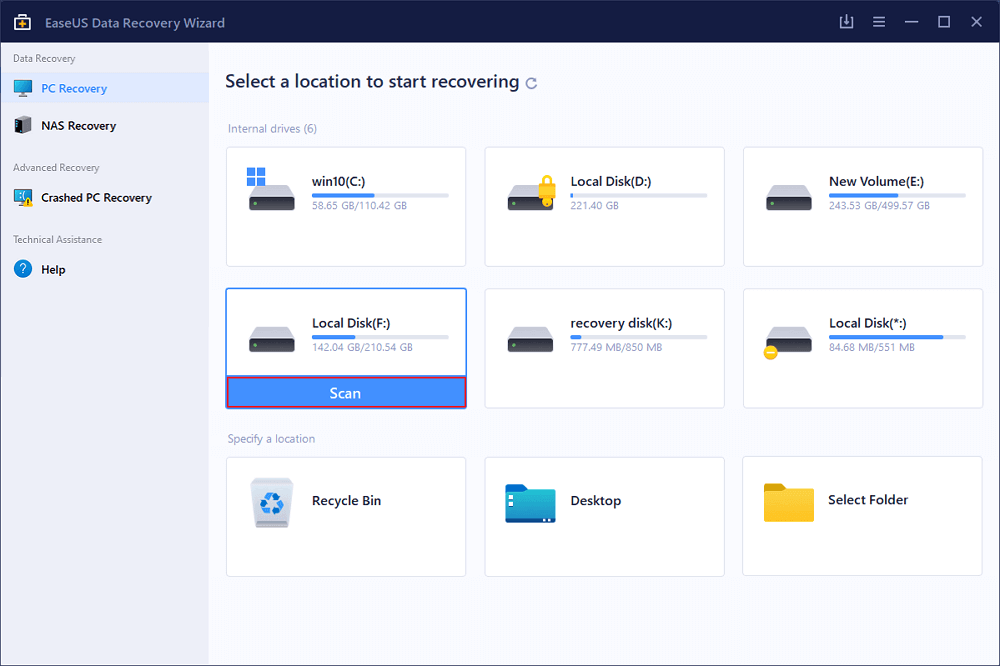
Launch the program and select the M.2 SSD where you lost your data.
-
Select the “Scan” button to initiate the scanning process.
-
The software will scan the SSD for recoverable data.
-
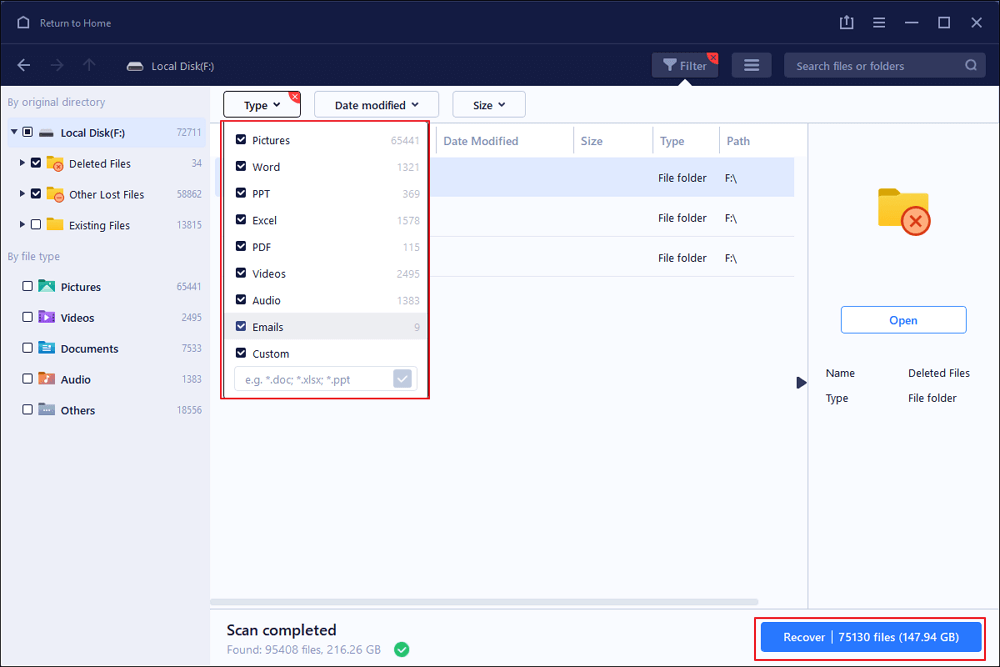
Once the scanning is complete, you can use the “Filter” and “Search” options to locate the lost files in the “Deleted Files” and “Other Lost Files” folders.
-
Preview the recovered data to verify its integrity.
-
Click the desired files you want to recover.
-
Choose the “Recover” button to initiate the data recovery process.

-
Choose a different storage location to save the recovered files to avoid overwriting any existing data on the M.2 SSD.
By following these steps, you can use EaseUS Data Recovery Wizard to recover your undetected data from the M.2 SSD. Remember to store the recovered files in a safe location to prevent any further data loss.
4.2 Using Tenorshare 4DDiG Data Recovery
To recover undetected data from an M.2 SSD, you can follow these steps:
Step 1: Secure Download
Download and install the 4DDiG data recovery application, ensuring you download it from a trusted source.
Step 2: Launch the 4DDiG App and Select the M.2 SSD Drive
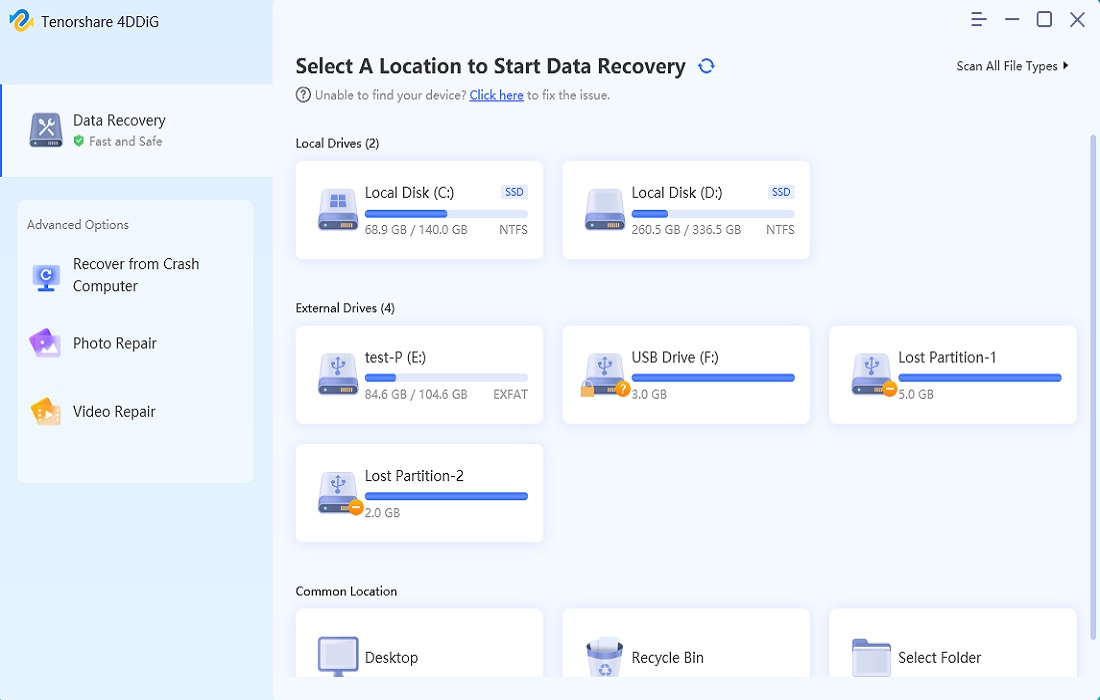
Open the 4DDiG data recovery application and choose the M.2 SSD drive that is not being detected from the initial window.
Step 3: Start the Scan
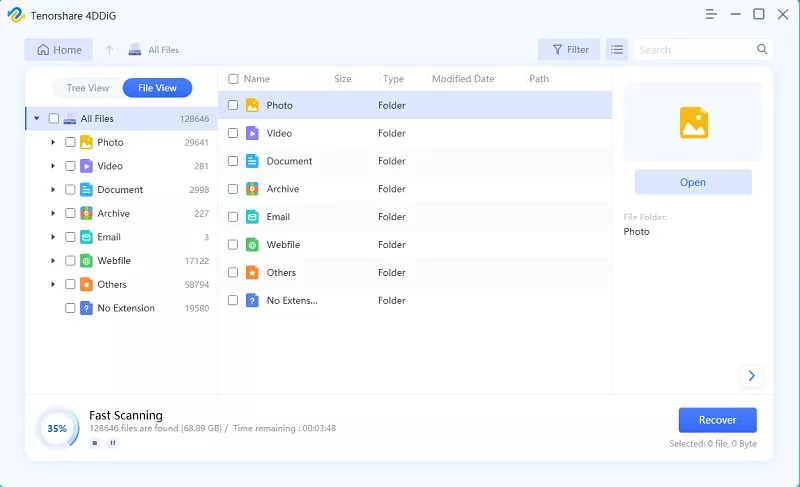
Choose on the “Scan” button to initiate the scanning process. In the next window, you can select the specific file types you want to recover from the M.2 SSD. Once you’ve made your selections, click “OK” to proceed.
Step 4: Scanning Process
The application will now start scanning the M.2 SSD and gradually list all the deleted files it can find on the drive. The scanning process may take some time depending on the size of the drive and the amount of data stored on it.
Step 5: Preview and Select Files for Recovery
Once the scanning process is complete, you will be able to preview the found files. Browse through the list and select the files you want to recover. You can utilize the search bar or filter options to locate specific files more efficiently.
Step 6: Recover the Selected Files
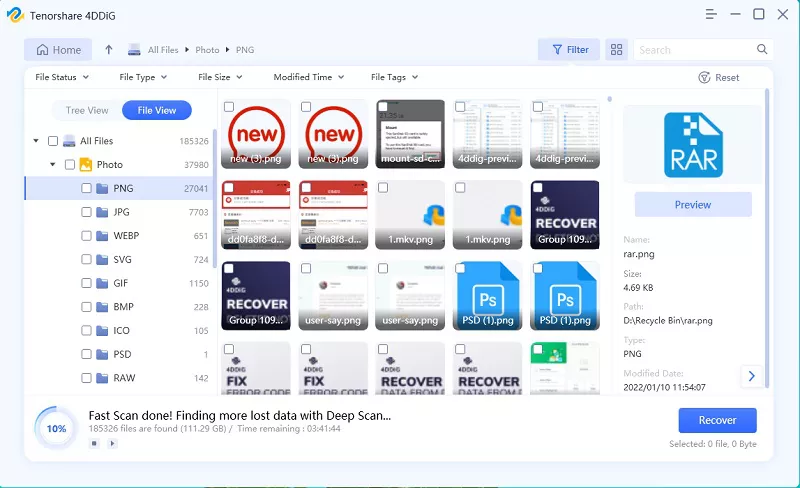
After selecting the desired files, click on the “Recover” button. Select a safe location on your computer where you want to save the recovered files. It is recommended to save the files to a different drive or external storage device to avoid overwriting any existing data.
By following these steps, you can use the 4DDiG data recovery application to recover undetected data from an M.2 SSD. Remember to handle the recovered files with care and create regular backups to prevent data loss in the future.
5. Conclusion
The M.2 drive is a compact and high-performance solid-state drive that offers faster data transfer rates and replaces traditional storage devices like HDDs. When an M.2 drive is not showing up, it can be due to physical connection issues, compatibility issues, or driver/firmware-related problems. Troubleshooting steps involve inspecting and reconnecting cables, checking compatibility and settings, and updating drivers and firmware. In case of data loss, data recovery software like EaseUS Data Recovery Wizard or Tenorshare 4DDiG Data Recovery can be used to recover undetected data from an M.2 SSD. It is crucial to handle recovered files with care and regularly back up important data to prevent future data loss.