Removing Watermarks in Photoshop: A Step-by-Step Guide

Watermarks are commonly used to protect and identify digital images, but they can sometimes be unwanted or obstructive. In this paper, we explore various methods to remove watermarks using Adobe Photoshop, a widely used image editing software. Whether you are a professional photographer, or simply someone looking to enhance personal images, understanding these techniques can be invaluable.
1. How to Remove Watermarks in Photoshop?
Method 1: Clone Stamp Tool
To remove watermarks from an image in Photoshop, you can utilize the Clone Stamp Tool. Follow the steps below to understand how to eliminate a watermark using this tool:
Step 1: Import and Layer Setup
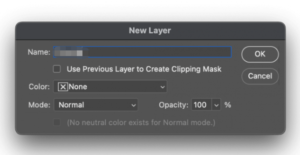
Import the image into Photoshop and add a new layer using the “Add New Layer” option in the Layers panel. Align the new layer with the Background layer by selecting the lock position option.
Step 2: Clone Stamp Tool
From the left toolbar, choose the “Clone Stamp Tool.” Sample pixels from areas near the watermark by holding the Alt key and clicking on the desired area. Release the Alt key and start stamping over the watermark to remove it.
Step 3: Healing Brush Tool
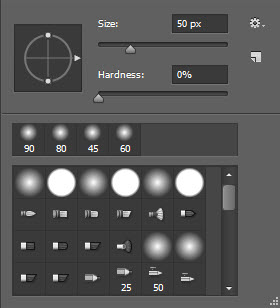
If remnants of the watermark remain, select the Healing Brush Tool from the toolbar. Right-click on the image and adjust the brush settings for size and hardness.
Step 4: Remove Watermark
Sample pixels again and use small clicks to paint over the image, gradually eliminating the watermark. Continue painting until the watermark is completely removed.
By following these steps, you can effectively remove watermarks from your images using the Clone Stamp Tool in Photoshop.
Method 2: Content-Aware Fill
To remove watermarks from an image in Photoshop using the Content-Aware Fill tool, follow these steps:
Step 1: Import and Select
Open the image in Photoshop. Access the magic wand tool from the Photoshop settings. Zoom in to the watermark area. Utilize the magic wand tool to select the watermark.
Step 2: Expand and Remove
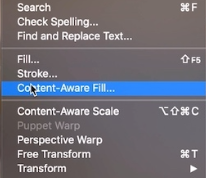
Expand the selected watermark by 5 pixels. Go to “Select,” click on “Modify,” and choose “Expand.” To remove the watermark, go to “Edit” > “Content-Aware Fill.” Set the blending mode to “Normal” and opacity to 100%. The tool will automatically remove the watermark, revealing the image without any watermarks.
By following these steps, you can effectively utilize the Content-Aware Fill tool in Photoshop to remove watermarks from your images.
Method 3: Healing Brush Tool
To remove watermarks in Photoshop using the Healing Brush Tool, follow these steps:
Step 1: Import and Prepare Image
Import your image into Photoshop. Navigate to the left-side toolbar and select the Clone Stamp Tool. Adjust the brush hardness and size to your preference. Right-click on the image to retouch it.
Step 2: Remove the Watermark
Position your cursor over the watermark area and hold the Alt button. Select a different area of the image to extract pixels for removing the watermark. Release the Alt button when finished.
Step 3: Use the Healing Brush Tool
Employ the left mouse button to remove the watermark as desired. Next, choose the Healing Brush Tool from the left-side toolbar. Right-click to access the settings and customize the brush size.
Step 4: Heal the Remaining Spots
To eliminate any remaining spots, hold the Alt key and sample pixels from the original watermark. Start with a small area and gradually expand to cover the entire watermark.
By following these steps and utilizing the Healing Brush Tool in Photoshop, you can effectively remove watermarks from your images.
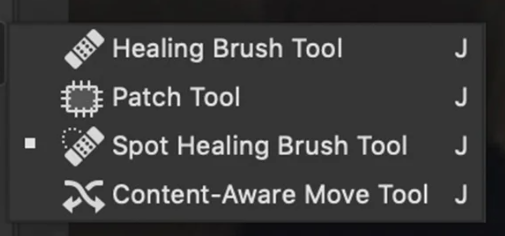
Method 4: Patch Tool
To remove watermarks in Photoshop, you can utilize the Patch tool. Follow these steps to understand how to remove a watermark using the Patch tool:
Step 1: Import and Select
Import the image into Adobe Photoshop. Access the Patch tool from the toolbar. Click on an adjacent area to the watermark and draw a selection around it. Release the mouse button and then choose the watermark area.
Step 2: Patch and Blend

Click and drag your selection to a similar area in the image that seamlessly blends with the area you want to cover up. The Patch tool intelligently replaces the selected region with pixels from a different part of the image, ensuring a smooth blending effect.
Step 3: Finalize and Save
Once you are satisfied with the results, save the file in TIFF or PSD format to preserve the separate retouching layer created during the process.
By following these steps and utilizing the Patch tool in Photoshop, you can effectively remove watermarks from your images.
2. How to Remove Watermarks With Ease?
Step 1: Install HitPaw Watermark Remover


To easily remove watermarks from photos without using Photoshop, start by downloading, installing, and launching HitPaw Watermark Remover on your PC. Import your photos by either tapping the import option or dragging and dropping them into the program.
Step 2: Highlight the Watermark Area
Use the Polygonal Lasso Tool or Marquee Tool to select and highlight the watermark area. Enable the Preview option and, if required, download the necessary AI model for the removal process.
Step 3: AI-Powered Removal

Once the AI model is downloaded, tap the Preview option again, and the tool will employ AI technology to seamlessly remove the watermark from your photo.
Step 4: Export and Save
If you’re satisfied with the removal results, tap the Export option to save the edited photo. Additionally, you can access the Settings option to choose the desired path for saving the exported images.
By following these steps and utilizing the HitPaw Watermark Remover, you can easily remove watermarks from your photos without the need for Photoshop.
3. Conclusion
Adobe Photoshop provides effective methods for removing watermarks from images. Alternatively, tools like HitPaw Watermark Remover offer user-friendly alternatives. These techniques empower users to enhance images by eliminating unwanted watermarks and achieving their desired results.
4. FAQs
Q: What is Content-Aware Fill?
A: Content-Aware Fill is a feature in Adobe Photoshop that intelligently analyzes the surrounding pixels and fills in selected areas with similar content, allowing for seamless removal or replacement of unwanted elements like watermarks.
Q: How does the Clone Stamp Tool work?
A: The Clone Stamp Tool in Photoshop allows users to sample pixels from one area of an image and clone them onto another area. This tool is commonly used for removing watermarks by replacing the watermark pixels with pixels from nearby areas.
Q: Can watermarks be removed automatically using Photoshop?
A: Yes, Photoshop offers automated tools like Content-Aware Fill that can remove watermarks from images with minimal manual intervention. These tools utilize advanced algorithms and artificial intelligence to analyze and replace the watermark pixels.