[Newest Guide] How to Crop PDF in Preview on Mac?

Unleash the power of PDF manipulation on your Mac! In this paper, we delve into the art of cropping PDF files, focusing on the user-friendly Preview app. Discover simple steps, alternative tools like PDFelement, and expert tips to perfect your PDF cropping skills. Get ready to transform your documents with precision and ease.

1. How to Crop PDF in Preview on Mac?
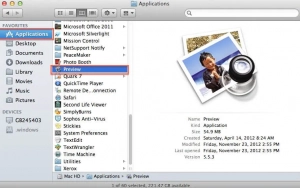
Step 1: Opening the PDF in Preview
Launch Preview and navigate to the PDF you wish to crop.
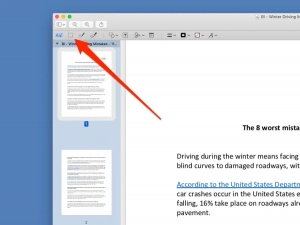
Step 2: Accessing the Markup Toolbar
In order to access the cropping tools, you need to locate and click the small pen point icon at the top of the Preview interface. Alternatively, you may access the toolbar via the “View” option, where “Show Markup Toolbar” is located. From the markup toolbar, choose the “Rectangular Selection” button.
Step 3: Selecting the Cropping Area
To crop a specific page from a PDF, simply move the mouse pointer to that page. Left-click at the starting point of the desired cropping area, and while holding down the mouse button, drag the cursor to select the area on the page you wish to keep.
Step 4: Performing the Crop
Once you have made the selection, a “Crop” button will appear on the markup toolbar. Click the “Crop” button to perform the crop operation on the selected area.
Step 5: Understanding the Crop Warning
After clicking the “Crop” button, a prompt will appear, warning you that cropping a PDF document does not delete the content outside the selected area. It informs you that the content outside the selection is only hidden within Preview and may still be visible in other applications. Click the “OK” button to proceed if you understand and accept this warning.
Step 6: Saving the Cropped PDF
If you want the content outside the cropping selection to be permanently removed from the PDF, Click “File” menu and select “Export as PDF.” This action will save the cropped PDF as a new file, ensuring that it appears the same in any application.
If you follow these guides, you’ll have no trouble cropping a PDF using the Preview program on your Mac. Please note that Preview’s cropping feature is limited to one page at a time, providing a quick and efficient solution for basic cropping needs.
2. Additional Ways to Crop PDF Files on Mac
2.1 Using PDFelement to Crop PDF Files
Step 1: Install PDFelement

First, you need to install PDFelement on your Mac. Once installed, open the application to begin cropping your PDF.
Step 2: Open the PDF
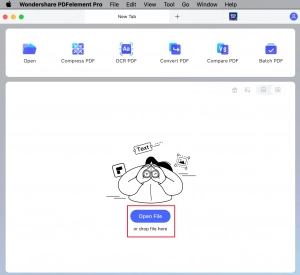
In the main window of PDFelement, click on “Open File” and search for the PDF document you want to crop.
Step 3: Select the Area to Crop
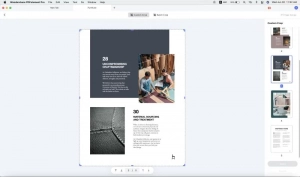
After opening the PDF, select the “Tool” menu from the left sidebar. To crop pages, select that item from the menu. This will display a dotted dialogue box around the page. Drag the box to select the specific area you wish to keep after cropping.
Step 4: Crop the PDF on Mac
The selected area inside the dotted box will be retained, while the rest of the document will be cropped. If you need to crop multiple pages, proceed to the next page and repeat the process of selecting the desired area. Once you have set all the areas you want to keep, click the “Apply” button to crop the PDF. This action will execute the cropping for all the selected pages simultaneously.
Note: If you want to crop all the pages using the same area, you can set the cropping area for one page. Then, click the button labeled “Apply the same cropping to all pages.” Afterward, click the “Apply” button to immediately crop all pages accordingly.
2.2 Using EaseUS PDF Editor
Step 1: Launch EaseUS PDF Editor

Open the EaseUS PDF Editor software and begin the editing process by importing the desired PDF file into the program.
Step 2: Access the “Crop” Option

Locate the “Pages” button on the top toolbar of the software. Click on it and select the “Crop” option from the right sidebar menu.
Step 3: Select and Adjust the Cropping Area

Click and drag your mouse to create a rectangle region on the PDF page, indicating the area you wish to keep. Double-click within the selected region to open a window where you can make adjustments to the cropping settings.
Step 4: Export the Cropped PDF

Once you are satisfied with the cropped PDF, proceed to export and save the edited file on your computer or desired location.
3. Tips for Cropping PDFs on Mac
◈Plan your cropping area
Before starting the cropping process, take a moment to plan and visualize the specific area you want to keep in the PDF. It’ll speed up the cropping process and make sure it’s done well.
◈Utilize the zoom feature
Zooming in on the PDF page can help you achieve a more precise crop. Use the zoom controls available in your PDF viewer (such as Preview or Adobe Acrobat Pro) to get a closer look at the details before making your selection.
◈Maintain aspect ratio
If you want to maintain the original aspect ratio of the PDF page while cropping, make sure to hold the Shift key while dragging the crop selection. This will keep the proportions intact and prevent distortion.
◈Check page orientation
Pay attention to the page orientation (portrait or landscape) of the PDF before cropping. Ensure that your cropping area aligns with the correct orientation to avoid cropping unintended areas.
◈Preview the crop
Many PDF viewers offer a preview feature that allows you to see the result of the crop before applying it. Take advantage of this functionality to review and adjust the cropping area if needed.
◈Save a backup copy
If you’re unsure about the outcome of the cropping process or want to preserve the original PDF, make a backup copy of the file before cropping. This way, you can always revert to the original if necessary.
4. Summary
The paper provides steps for cropping PDFs in Preview on a Mac, including accessing the Markup Toolbar and selecting the cropping area. It also suggests using PDFelement or EaseUS PDF Editor to crop PDFs and provides tips such as planning the cropping area and maintaining aspect ratio. The article emphasizes the importance of previewing the crop and creating a backup copy of the original PDF.