Screenshots Made Easy: Exploring the Best Free Tools for Mac

With a plethora of free screenshot tools available for Mac, it can be overwhelming to choose the right one. This paper aims to highlight and compare the best free screenshot tools for Mac, discussing their features, pros, and cons, helping you find the perfect tool to capture and enhance your screen captures effortlessly.
1. Built-in Screenshot Tools on Mac
♠Grab
Grab is a built-in utility on Mac that allows users to capture screenshots. It offers different capture options, including selection, window, screen, and timed capture.
♠Keyboard shortcuts
Mac provides convenient keyboard shortcuts to capture screenshots directly.
The primary shortcuts are:
- Command + Shift + 3: Captures the whole screen and stores it to the desktop as a file.
- Command + Shift + 4: Enables selection mode, allowing users to capture a specific area on the screen.
- Command + Shift + 4, then Spacebar: Enables window capture mode, allowing users to capture a specific window or menu.
♠Preview
The Preview app on Mac offers basic screenshot functionality. Users can open Preview, go to the “File” menu, and choose “Take Screenshot” to access different capture options.
2. Best Free Screenshot Tools for Mac
Tool 1: Lightshot

Pros:
✅Lightweight and easy-to-use interface.
✅Offers a wide range of annotation and editing tools.
✅Allows instant sharing of screenshots through links.
✅Provides customizable keyboard shortcuts for efficient capturing.
Cons:
✘Limited cloud storage options.
✘No video recording capabilities.
✘Mac version may not have all the features available on other platforms.
Tool 2: Skitch
Pros:
✅User-friendly interface with intuitive annotation and editing tools.
✅Offers cloud syncing and easy sharing options.
✅Supports various capture modes, including full screen, window, and timed capture.
✅Integration with Evernote for seamless note-taking and organization.
Cons:
✘Requires an Evernote account for full functionality.
✘Advanced editing features may be limited compared to other tools.
✘Some users may find the interface outdated.
Tool 3: Snagit

Pros:
✅Extensive editing and annotation features, including arrows, shapes, and text.
✅Offers scrolling capture to capture long webpages or documents.
✅Allows users to record videos and create GIFs.
✅Provides cross-platform compatibility with Windows.
Cons:
✘Free version has limited functionality and adds watermarks to captures.
Tool 4: Monosnap

Pros:
✅Customizable capture options, including full screen, window, and region.
✅Offers editing tools such as annotations, arrows, and blur effects.
✅Provides cloud storage for easy sharing and collaboration.
✅Supports video recording and webcam capture.
Cons:
✘Free version has limited cloud storage space.
✘Some users may find the interface less intuitive.
✘Advanced features may require a premium subscription.
Tool 5: Xnapper
Pros:
✅Offers a simple and straightforward interface.
✅Enables users to capture screenshots and record videos.
✅Provides basic annotation tools for image editing.
✅Allows sharing of captures through various platforms.
Cons:
✘Less known
Note: The pros and cons provided are based on general user feedback and may vary depending on individual preferences and specific use cases.
3. Factors to Consider in Selecting the Best Screenshot Tool
✧Use case
Determine your specific needs and requirements for capturing and editing screenshots. Consider whether you need advanced editing features, frequent video recording, or seamless sharing options.
✧User-friendliness
Choose a tool that aligns with your comfort level and preference in terms of interface and ease of use.
✧Workflow integration
If you use other productivity tools or cloud services, consider a tool that integrates well with those platforms.
✧Customization options
If you value flexibility and customization, opt for a tool that allows you to tailor the capture settings and editing features to your liking.
✧Community and support
Assess the availability of tutorials, user forums, and customer support for each tool to ensure a smooth experience.
4. Why Choose Xnapper?
With Xnapper, users can snap beautiful screenshots instantly in just two seconds, making it a quick and efficient tool. It automatically balances screenshots for a visually pleasing result, adjusts the background color to enhance content focus, and provides the ability to redact sensitive information with a single click.
5. How to Take Screenshots on Mac?
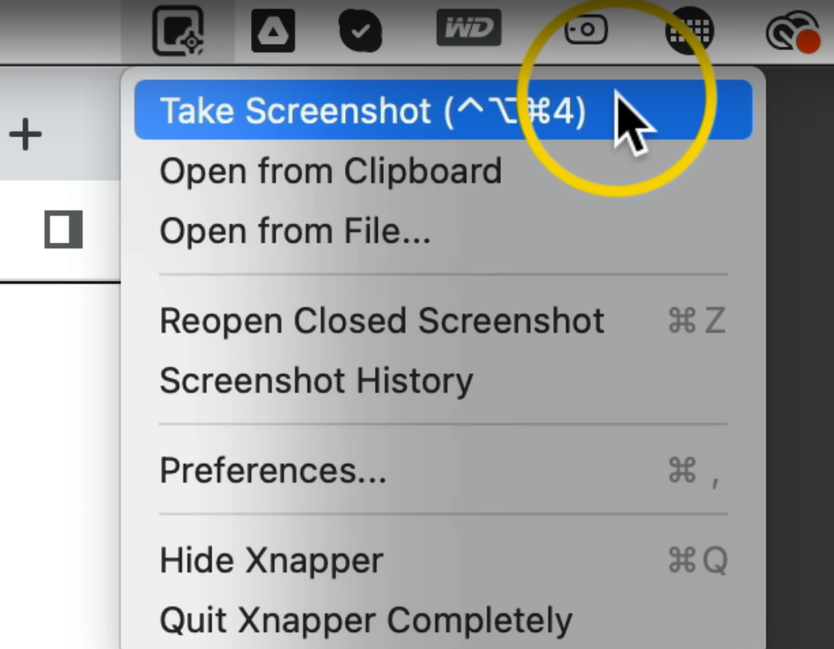
Step 1: Install and Launch Xnapper
After installing Xnapper on your Mac, you can locate it at the top of your screen. Alternatively, use the shortcut keys to take a screenshot.
Step 2: Access Preferences
Open Xnapper’s preferences to access additional settings and customization options.
Step 3: Set Custom Shortcut
Within the preferences, you can set a custom shortcut for taking screenshots. Choose a combination of keys that is convenient for you.
Step 4: Adjust Save Location
If desired, you can modify the default location where your screenshots are saved. Customize it according to your preferences.
Step 5: Capture Your Screenshot
With Xnapper ready, use your customized shortcut keys to capture a screenshot. Press the assigned keys simultaneously, and you will see the screenshot tool interface appear.
Step 6: Adjust and Save
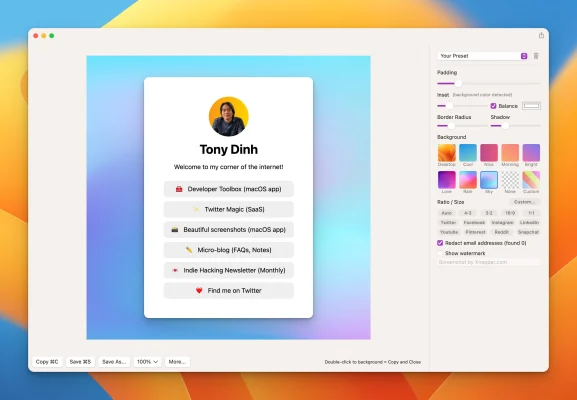
Once the screenshot tool interface is visible, position and frame your desired screenshot area. Xnapper automatically adds white space and performs the necessary adjustments. When you’re satisfied, save the screenshot.
By following these steps, you can easily take screenshots on your Mac using Xnapper, making the process quick and efficient.
6. The Bottom Line
By considering factors such as features, ease of use, customization options, and platform compatibility, you can choose the tool that best suits your requirements and enhances your productivity when capturing and editing screenshots on your Mac.