Top Minecraft Recording Software for Mac

Why record your Minecraft gameplay on a Mac? Have you ever wondered how capturing your in-game adventures can enhance your gaming experience? The ability to document and share your gameplay not only preserves cherished memories but also opens doors to content creation, skill improvement, and community engagement. In this paper, we will explore the reasons why recording Minecraft on a Mac is beneficial, as well as discuss the top recording software available for Mac users. So, are you ready to delve into the world of Minecraft recording and discover how it can take your gameplay to new heights? Let’s dive in!
1. Why Should We Record Minecraft?
✎Memory preservation
Recording allows you to capture memorable moments, achievements, and creative builds, preserving them for future enjoyment and reminiscing.
✎Skill improvement
Reviewing gameplay recordings helps you analyze your strategies, identify mistakes, and learn from them, leading to continuous skill improvement.
✎Content creation
Recording Minecraft gameplay opens doors for content creation, including creating YouTube videos, streaming on platforms like Twitch, or sharing with friends, showcasing your creativity and entertaining others.
✎Sharing experiences
By recording and sharing gameplay, you can connect with the Minecraft community, exchange ideas, inspire others, and receive feedback on your gameplay and creations.

✎Documentation and tutorials
Recorded gameplay can be used to create tutorials, walkthroughs, or guides, helping other players learn new techniques, explore mods, or understand complex game mechanics.
✎Personal growth and reflection
Going through recorded gameplay allows you to reflect on your progress, celebrate achievements, and appreciate your growth as a player, fostering a sense of personal satisfaction.
Overall, recording Minecraft gameplay enriches your gaming experience, promotes growth and creativity, and enables you to connect with a wider community of Minecraft enthusiasts.
2. Top 5 Minecraft Recording Software for Mac
2.1 EaseUS RecExperts
EaseUS RecExperts is a versatile Minecraft recording software for Mac that allows users to capture high-quality gameplay footage with ease.
Key features:
-
Intuitive interface: The software provides a user-friendly interface, making it easy for beginners to start recording their Minecraft gameplay.
-
Flexible recording options: Users can record the entire screen, specific windows, or custom regions according to their preferences.
-
Audio capture: EaseUS RecExperts enables users to record in-game audio and add voice commentary simultaneously.
-
Editing tools: The software offers basic editing features like trimming, cutting, and merging recordings, allowing users to refine their gameplay footage.
-
Multiple output formats: It supports various video formats, ensuring compatibility with different devices and platforms.
-
Live streaming: Users can also stream their Minecraft gameplay in real-time to popular streaming platforms.
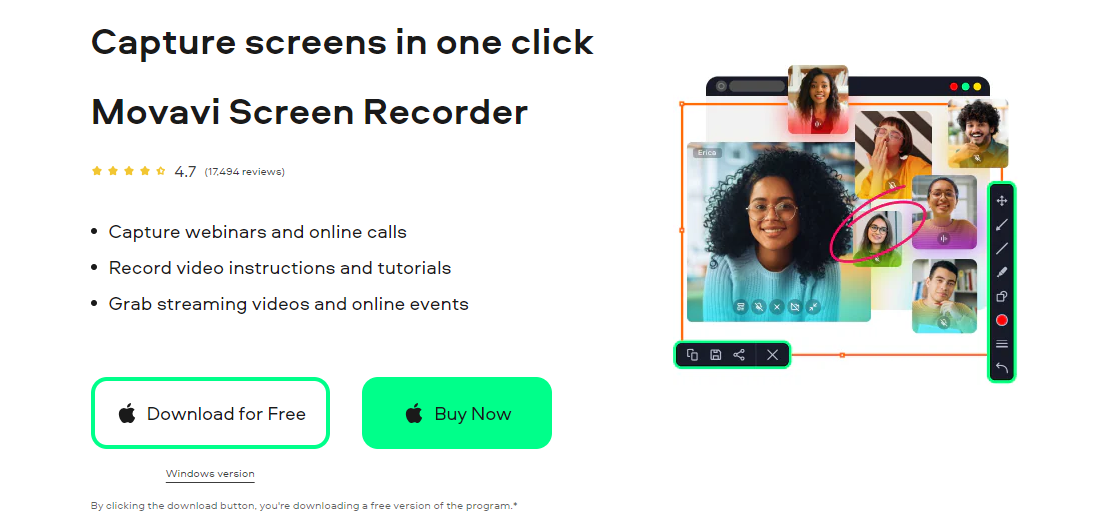
2.2 Movavi Screen Recorder
Movavi Screen Recorder is a feature-rich software that enables users to record Minecraft gameplay on their Mac systems effortlessly.
Key features:
-
Easy setup: The software provides a straightforward setup process, allowing users to start recording quickly.
-
Customizable capture area: Users can choose to record the entire screen or select specific areas for recording.
-
Audio recording: Movavi Screen Recorder captures in-game audio and external audio sources such as microphones for voiceovers.
-
Video editing: It offers editing tools like trimming, cutting, and adding transitions, enabling users to polish their gameplay recordings.
-
Export options: Users can save their recordings in different formats and adjust video quality settings as per their requirements.
-
Scheduler: The software allows users to schedule and automate recordings, ensuring they never miss an important Minecraft session.
2.3 PassFab Screen Recorder
PassFab Screen Recorder is a reliable Minecraft recording software designed for Mac users to capture their gameplay effortlessly.
Key features:
-
One-click recording: The software offers a simple and intuitive interface, allowing users to start recording with just a single click.
-
High-quality recording: PassFab Screen Recorder ensures high-resolution and smooth gameplay recording without compromising performance.
-
Multi-channel audio capture: Users can record in-game sounds and add voice narration simultaneously.
-
Annotation tools: The software provides annotation features, such as text boxes and arrows, to highlight specific elements during gameplay.
-
Real-time editing: Users can edit their recordings during the recording process, adding watermarks, cropping, or trimming videos.
-
Direct sharing: PassFab Screen Recorder enables users to share their recorded gameplay on social media platforms directly from the software.
2.4 HitPaw Screen Recorder
HitPaw Screen Recorder is a user-friendly Minecraft recording software designed specifically for Mac, offering a seamless recording experience.
Key features:
-
Simple interface: The software provides an intuitive and minimalist interface, making it easy for users to navigate and access recording features.
-
Adjustable capture area: Users can choose to record the full screen or select specific regions based on their preferences.
-
Audio recording options: HitPaw Screen Recorder allows users to capture in-game audio, microphone input, or both simultaneously.
-
Real-time editing: Users can make on-the-fly edits like adding text, annotations, and shapes during the recording process.
-
Multiple output formats: The software supports various video formats, ensuring compatibility with different devices and video players.
-
Hotkey support: HitPaw Screen Recorder allows users to assign hotkeys for convenient control over recording start, stop, and pause functions.
2.5 Wondershare DemoCreator
Wondershare DemoCreator, previously known as Wondershare Video Converter Ultimate, offers comprehensive video recording capabilities, including Minecraft gameplay recording, on Mac systems.
Key features:
-
Versatile recording options: Wondershare UniConverter allows users to capture Minecraft gameplay in full screen, custom regions, or specific windows.
-
Multi-channel audio capture: Users can record in-game sounds, microphone input, or system audio, providing flexibility for voiceovers and commentary.
-
Real-time editing: The software offers editing tools such as trimming, cropping, adding watermarks, and applying effects during the recording process.
-
High-quality output: Wondershare UniConverter ensures high-resolution recordings with options to customize video settings like resolution, frame rate, and bitrate.
-
Batch recording: Users can record multiple gameplay sessions consecutively, saving time and effort.
-
Conversion and sharing: The software allows users to convert recorded gameplay videos to different formats and directly share them on social media platforms or video-sharing websites.
These top Minecraft recording software for Mac offer a range of features and functionalities, empowering users to capture, edit, and share their Minecraft gameplay recordings effortlessly.
3. How to Record Minecraft on Mac?
Method #1: Using EaseUS RecExperts

Step 1: Launch EaseUS RecExperts for Mac
-
Open EaseUS RecExperts on your Mac system.
-
Choose the “Full Screen” or “Region” option to select the desired recording area.
-
Enter the screen recording interface.
Step 2: Select Audio Source
-
Locate the audio icon at the lower-left corner of the screen recording interface.
-
Click on the audio icon to open the audio settings.
-
Choose the sound resource you want to capture, such as system audio or microphone input.
Step 3: Start Recording
-
Once you have set the recording area and audio source, click the “Rec” button to start the screen recording on your Mac.
During the recording, you can utilize additional features provided by EaseUS RecExperts, such as adding annotations, pausing or resuming the recording, and adjusting recording settings.
Once you have finished recording your Minecraft gameplay, click the stop button or use the hotkey to end the recording. The recorded gameplay will be saved to your designated location on your Mac.
Method #2: Using HitPaw Screen Recorder
Step 1: Download and Install HitPaw Screen Recorder
-
Install the software following the on-screen instructions.
Step 2: Select the Game
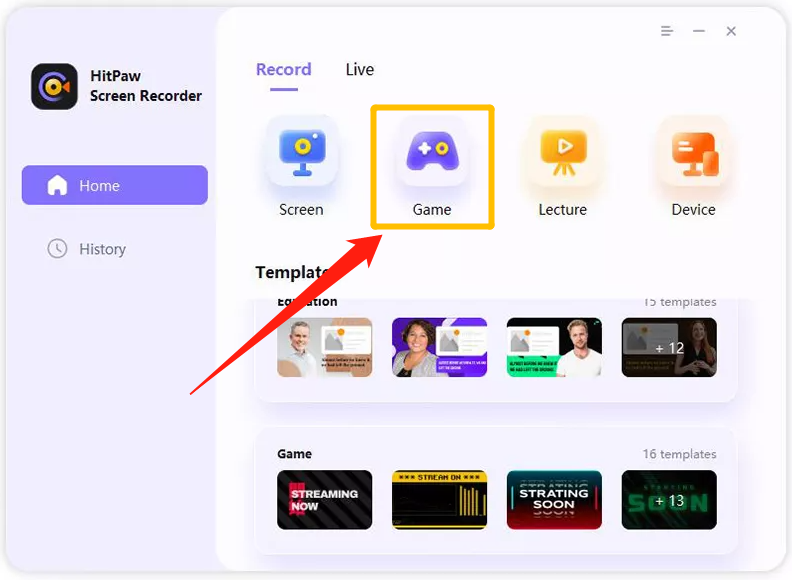
-
Launch HitPaw Screen Recorder on your Mac.
-
Click on the “Record Game” feature located on the main interface.
-
A toolbar will appear. Click the drop-down box to select Minecraft from the list of games.
-
Ensure that the Minecraft game window or application window remains open and visible throughout the recording process.
Step 3: Enable Keystrokes

-
To capture keystrokes during gameplay, click on the “Capture keystrokes” icon on the toolbar.
-
Alternatively, click on the “Settings” icon located at the bottom right corner of the toolbar.
-
In the “Effects” options, enable the “Show Keystrokes” function.
-
Choose a style for displaying the captured keystrokes.
Step 4: Start Recording
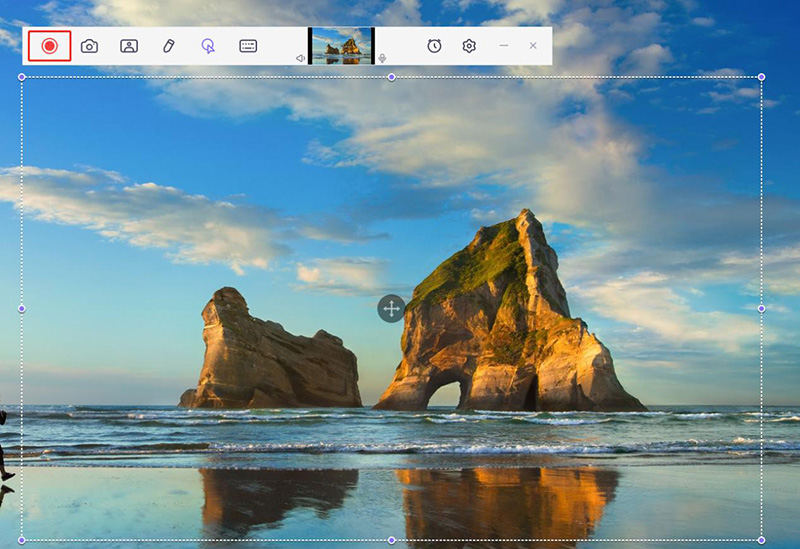
-
Once everything is set, click the “Start” button to begin recording your Minecraft gameplay.
-
HitPaw Screen Recorder allows you to record games or applications in the background without interfering with other computer operations.
Step 5: End Recording and Edit Video
-
To end the recording, click the “Stop” button on the toolbar.
HitPaw Screen Recorder will prompt you with a quick option to trim the recorded video if needed. The trimming option is located in the bottom right corner of the screen.
You can preview the recorded video by clicking the play icon and cut it to the desired length.
After completing the recording and editing process, you can find your recorded Minecraft gameplay video in the “History” section on the home interface of HitPaw Screen Recorder. Right-click the video to access various options such as editing, opening the output folder, renaming, or deleting the video file.
Method #3: Using Movavi Screen Recorder
Step 1: Download and Install Movavi Screen Recorder
- Download the Screen Recorder software designed for Mac.
- Follow the installation instructions provided to complete the setup.
Step 2: Launch Movavi Screen Recorder and Select Recording Options
- Open the program after installation and select the “Record Computer Screen” option.
- The sidebar will appear, and you should click on the video camera icon.
Step 3: Adjust Capture Frame and Position
- Use the cursor to resize the capture frame and position it on the specific area of the screen you want to record during your Minecraft gameplay.
Step 4: Start Recording
- Select the “REC” button to start recording your Minecraft gameplay on your Mac.
- Movavi Screen Recorder provides convenient hotkeys to control the recording process. Use “⌥ ⌘ 1” to pause and resume the recording and “⌥ ⌘ 2” to stop the recording.
Step 5: Edit and Trim the Recording
- After recording, you can edit the captured footage. Use the white marker to select any unnecessary parts and remove them by clicking the Scissors button.
- Delete the selected portions using the Trash Can button to complete the editing process.
Step 6: Export and Save the Recording
- Click the Export button to save your recorded Minecraft gameplay. Finally, click the Save button to complete the export process.
And then, you can record your Minecraft gameplay using Movavi Screen Recorder on your Mac and have your memorable moments captured and saved for future enjoyment.
4. The Bottom Line
Recording Minecraft gameplay on Mac provides numerous benefits, including memory preservation, skill improvement, content creation, sharing experiences, documentation, and personal growth. By utilizing top Minecraft recording software such as EaseUS RecExperts, Movavi Screen Recorder, PassFab Screen Recorder, HitPaw Screen Recorder, and Wondershare UniConverter, Mac users can easily capture, edit, and share their gameplay recordings. Whether it’s for personal enjoyment, creating content, or connecting with the Minecraft community, recording Minecraft on Mac enhances the gaming experience and enables players to showcase their creativity and skills.