How to Remove Silence from Audio or Video?

Silence can be golden, but in the world of audio and video production, excessive pauses or dead air can be more of an unwanted distraction than a cinematic pause for effect. Whether you’re a content creator, a podcaster, or a filmmaker, the need to remove silence from your audio or video recordings may arise to maintain a dynamic and engaging experience for your audience. In this comprehensive guide, we’ll explore various methods and tools to effectively remove silence, ensuring your content remains lively and captivating.
1. Understanding the Impact of Silence
Before delving into the techniques for removing silence, it’s essential to recognize the role of silence in audio and video content. While pauses and moments of quiet can be powerful for emphasis or dramatic effect, prolonged periods of silence may lead to disengagement and boredom. In interviews, podcasts, or video presentations, removing unnecessary silence can enhance the flow, maintain audience interest, and deliver a more polished final product.
2. Manual Removing Silence from Audio or Video
One of the most straightforward methods for removing silence is manual editing. This involves listening to the audio or watching the video and identifying sections of silence that need to be trimmed. Most digital audio workstations (DAWs) and video editing software provide a visual representation of the audio waveform, making it easier to spot silent areas.
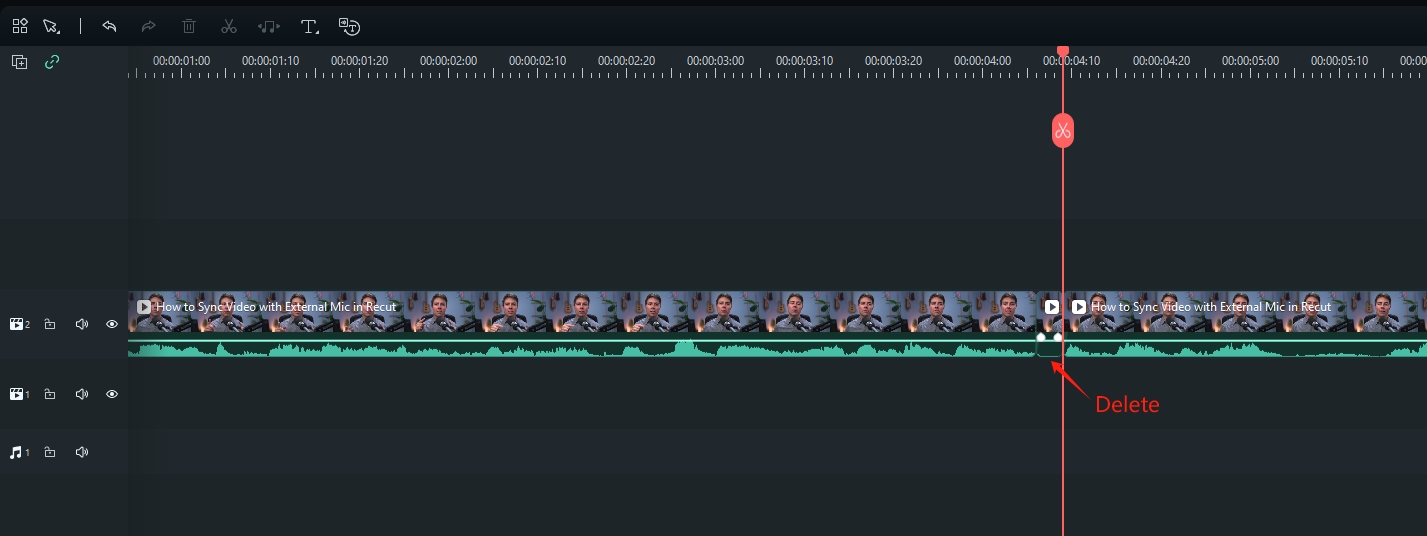
To manually edit silence, follow these steps:
- Open your audio or video file in a suitable editing software.
- Identify silent portions by observing the waveform or listening closely.
- Cut or delete the silent sections, ensuring a smooth transition between audio segments.
- Review the edited content to ensure it maintains a natural flow.
While manual editing gives you precise control, it can be time-consuming, especially for longer recordings. Therefore, it’s crucial to strike a balance between meticulous editing and efficiency.
3. Remove Silence Using Dedicated Silence Removal Tools
3.1 Audacity
Audacity is a free, open-source audio editing software that has gained widespread popularity for its robust features and user-friendly interface. While not specifically labeled as a “silence remover,” Audacity provides a range of tools that make it effective for editing audio, including removing silent sections.
Here are the steps to remove silence in Audacity in a concise format:
- Download, install, and launch Audacity on your computer, then open your audio file in Audacity.
- Understand the audio waveform; silence is often represented by flat lines.
- Use the selection tool to highlight the silent portion you want to remove.
- Navigate to the “Effect” menu at the top of the Audacity window.
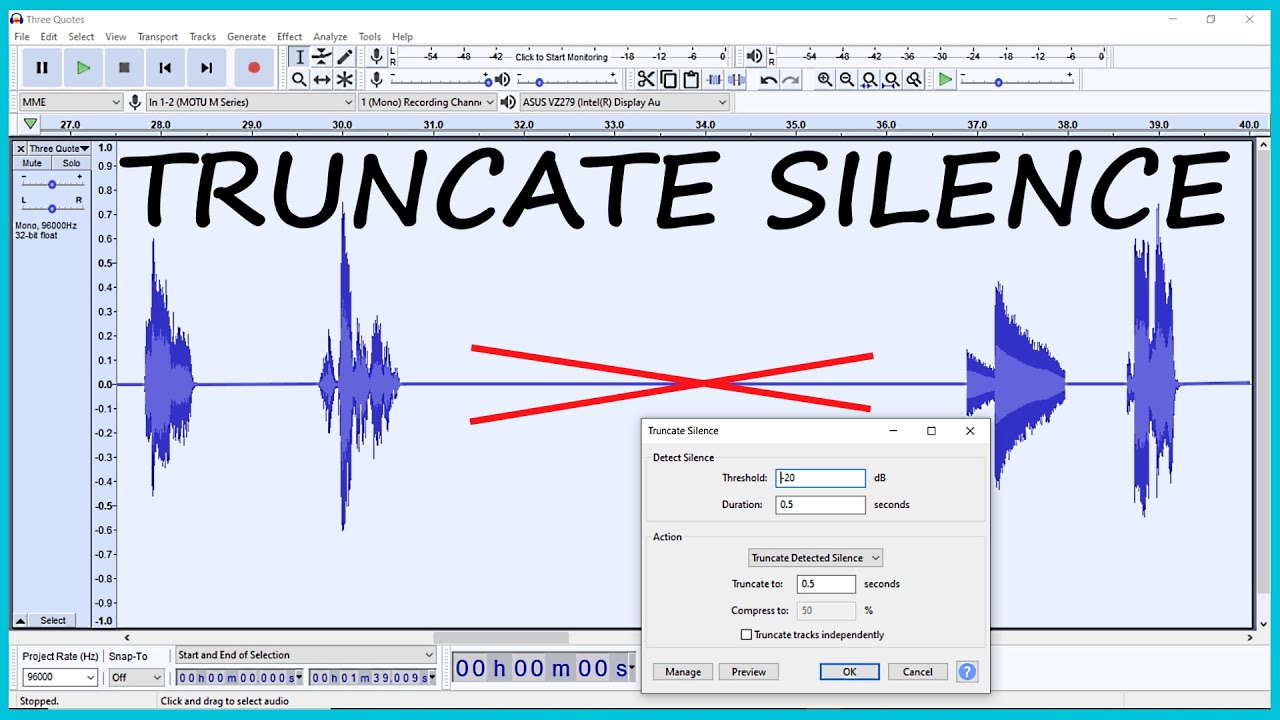
- From the “Effect” menu, select “Truncate Silence.” Customize settings like threshold and duration in the Truncate Silence dialog box.
- Click “Preview” to listen and adjust settings; then click “OK” to apply the effect. Listen to the entire file, undo or adjust if needed, then save your edited audio.
3.2 Adobe Audition
Adobe Audition is a professional audio editing software widely used in the music and film industry. It provides advanced features for audio editing, including tools for removing silence and enhancing audio quality. While Adobe Audition is a paid software, it offers a comprehensive set of features for professionals and enthusiasts alike.
Here are the steps to remove silence in Adobe Audition in a concise format:
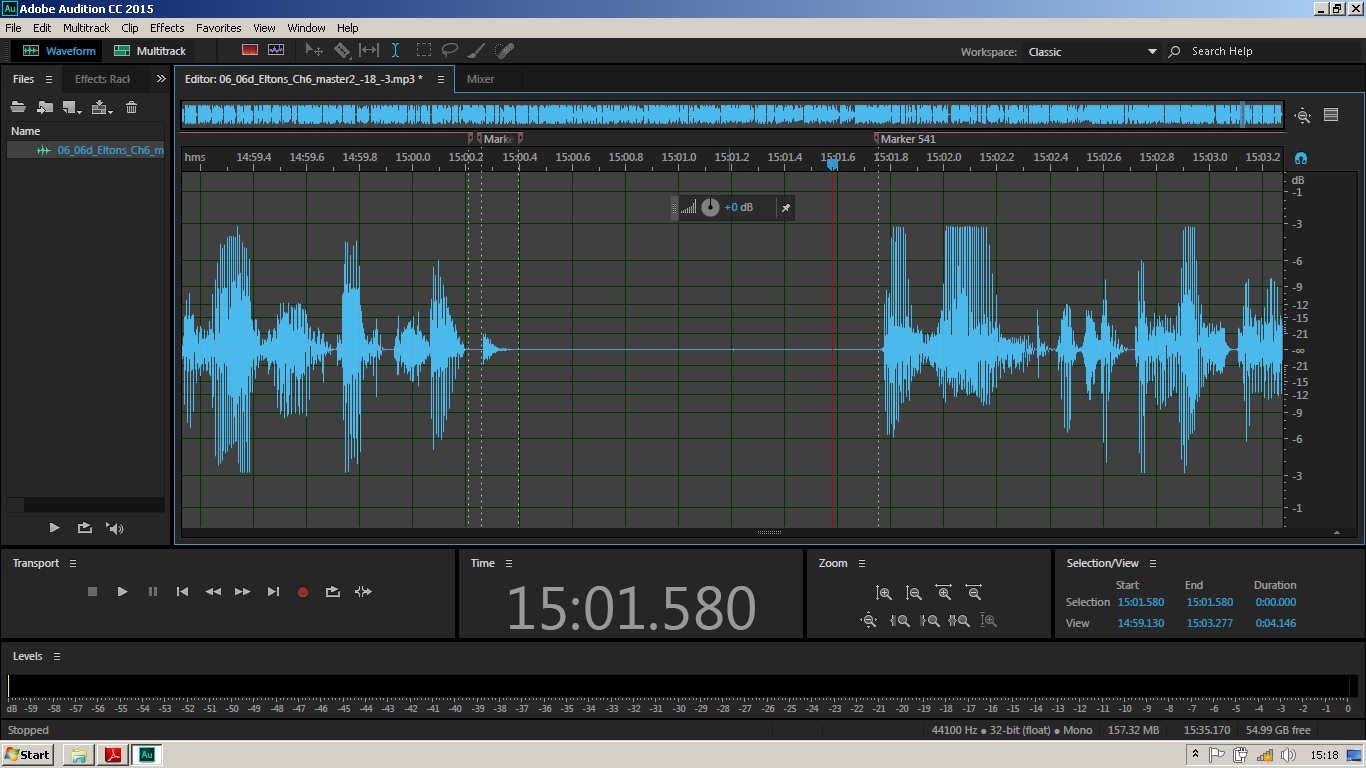
- Launch Adobe Audition and open your audio file.
- Use the selection tool to highlight the silent areas in the waveform
- Go to the “Effects” panel, choose “Amplitude and Compression,” and select “Dynamics Processing.”
- Adjust threshold, ratio, attack, and release settings in the Dynamics Processing dialog box.
- Click “Preview” to listen; adjust settings for the desired result.
- Click “OK” to apply the Dynamics Processing effect.
- Listen to the entire file to ensure seamless removal; save your edited audio.
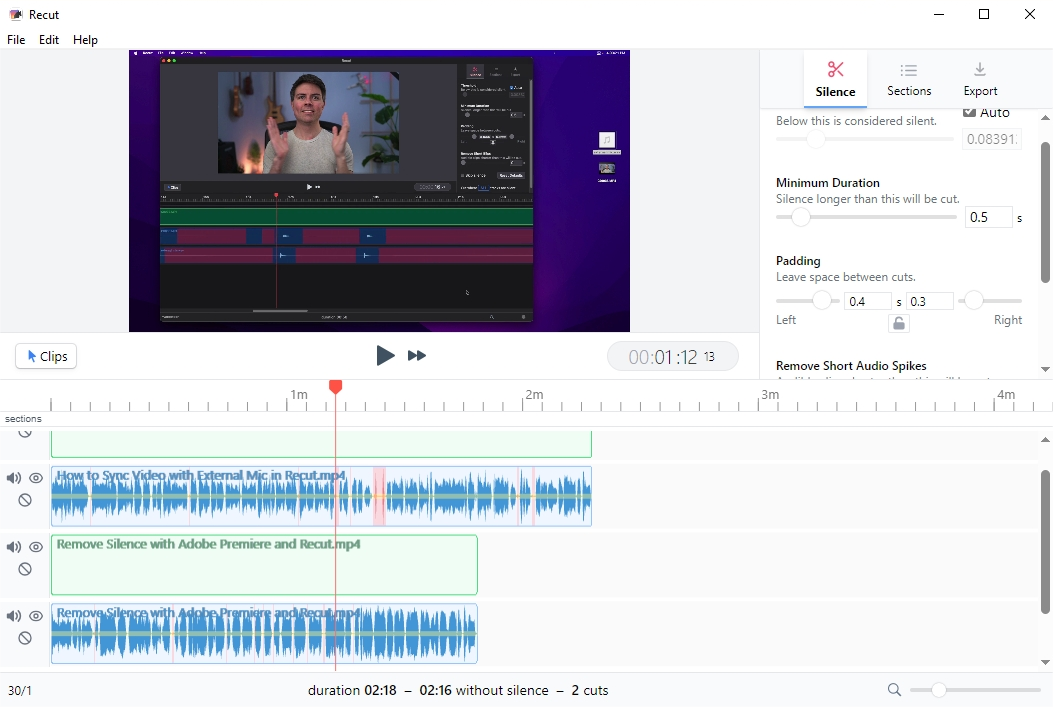
3.3 Recut
Recut stands as an automatic video editor and silence cutter designed for both Mac and Windows operating systems. It identifies silent segments within your videos, extending its functionality to podcasts as well. Users have the flexibility to fine-tune the settings, ensuring the output meets their desired audio quality standards.Before using Recut, let’s check out the main features of Recut:
- Automate Silence Removal: Recut swiftly eliminates pauses, providing an instant rough cut for your editing endeavors. Its precision extends to individual frames, and it seamlessly handles files from the most widely used cameras.
- Batch Editing Across Multiple Files: For those recording with multiple cameras, an external microphone, or simultaneous tracks, Recut effortlessly traverses them all while maintaining perfect synchronization.
- Effortless Editing of Audio-Only Content: Whether you’re recording podcasts, lectures, or any audio-exclusive material, Recut streamlines the editing process. It accommodates various formats, such as WAV, MP3, M4A, and more.
- Seamless Integration with Your Preferred Editor: Import your edited timeline effortlessly using an XML file, avoiding the need for re-encoding. Recut is compatible with popular editing software like DaVinci Resolve, Adobe Premiere, Final Cut Pro, ScreenFlow, OpenShot, and other XML-supported applications.
Now let’s explore the easy steps to cut and remove silence with Recut:
Step 1: Download and install Recut from the official website (It’s available for Windows and Mac).
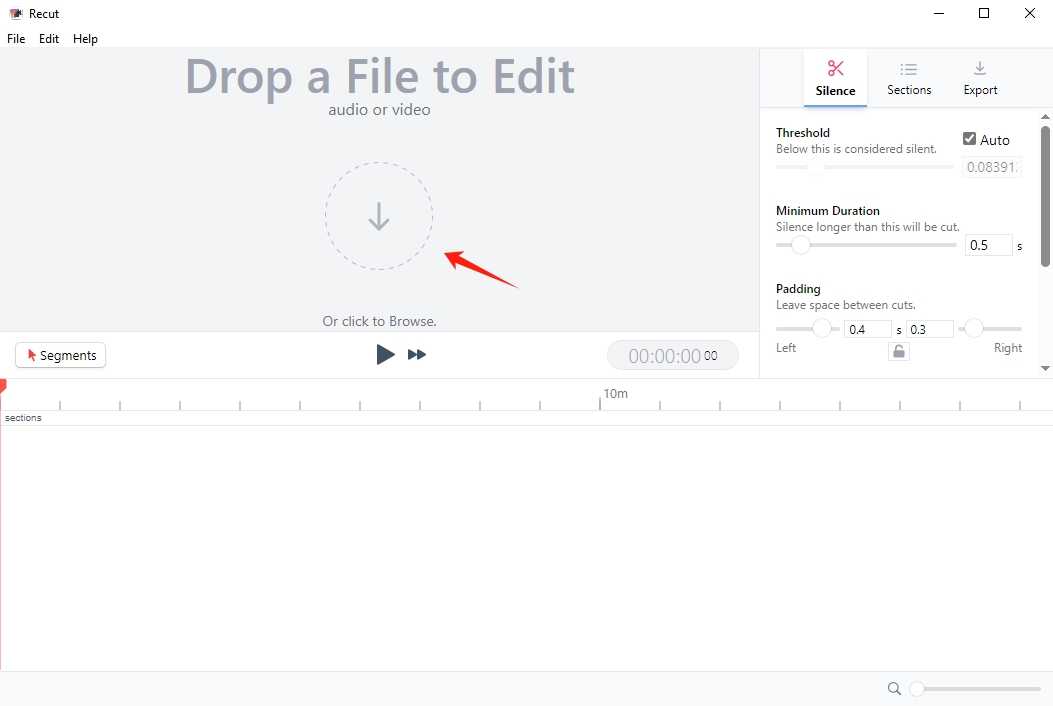
Step 2: Launch Recut and import the audio or video files you want to edit. Modify the settings and experience an instant preview of how it will sound, eliminating the need to wait for reprocessing.
Step 3: Create a fresh audio/video file upon completion, or seamlessly transfer the timeline to your preferred editor without any loss in quality to continue your editing endeavors.

4. Conclusion
Removing silence from audio or video recordings is a nuanced process that requires a careful balance between maintaining natural pauses and creating an engaging experience for the audience. Whether you choose to manually edit, use automatic noise reduction features, employ dynamic range compression, or leverage dedicated silence removal tools, the key is to strike a balance that enhances the overall quality of your content.
Experiment with different methods and tools to find the approach that best suits your specific needs and preferences. If you prefer a more automatic tool that helps to remove silence with just a few clicks, we suggest that you download Recut and give it a try.